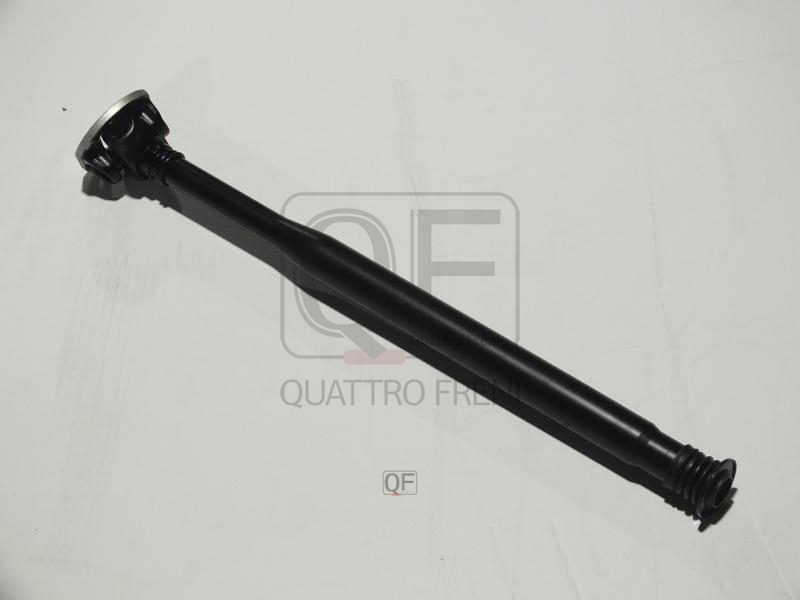
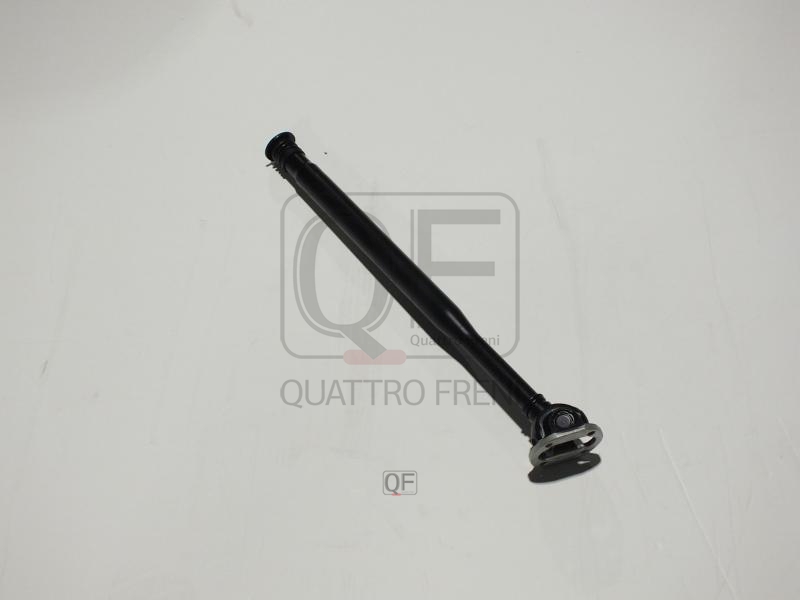
MERCEDES-BENZ A2044106801 SHAFT ASSY
Product Specifications
| MERCEDES-BENZ | A2044106801 |
| MERCEDES-BENZ | 2044106801 |
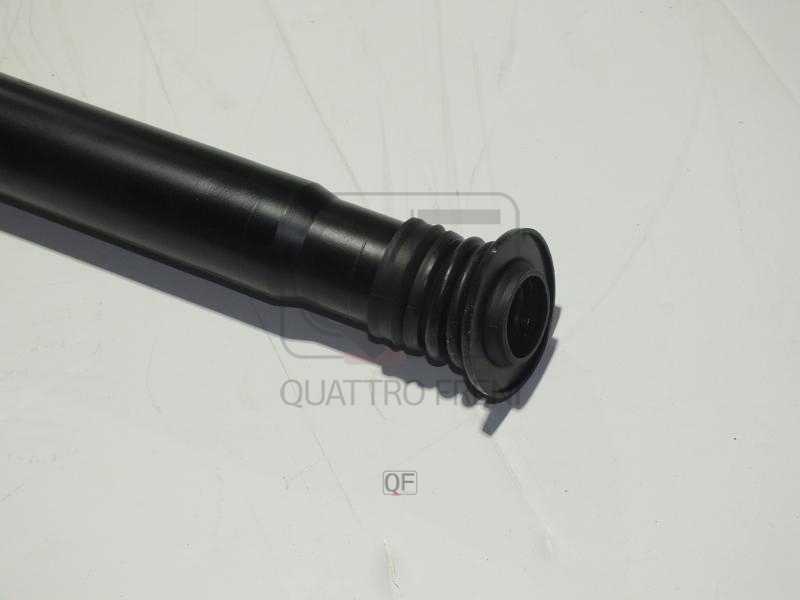
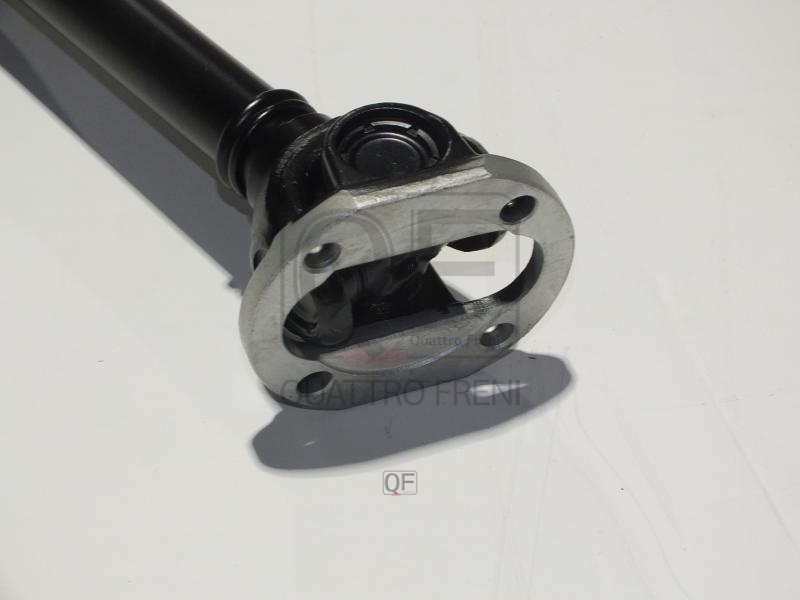
The SHAFT ASSY is a propeller shaft assembly — the torque-transmitting structural tube that connects the transmission output flange to the front or rear axle differential input flange on rear-wheel-drive, four-wheel-drive, and all-wheel-drive vehicles, conveying the full engine torque to the driven axle while accommodating the angular and axial displacement between the transmission and the differential as the suspension moves through its travel range and the body flexes under load. The assembly consists of a seamless steel or alloy steel tube of precisely calculated wall thickness and diameter — the tube's bending and torsional stiffness and its critical speed (the rotational speed at which the shaft begins to whip into resonance) are determined by the tube geometry; the tube is balanced to within fractions of a gram·centimetre at the factory to prevent rotational imbalance vibration across the full operating speed range. At each end of the tube, universal joint yoke flanges or slip yoke flanges are welded or press-fitted — the universal joints at each end accommodate the angular misalignment between the transmission output axis and the differential input axis, which changes as the body pitches under braking and acceleration load and as the differential moves with the rear suspension. On two-piece propeller shaft designs, a central slip joint or a sliding spline section allows the shaft's effective length to change as the driveline angle changes, and a centre bearing support assembly carries the shaft's midpoint weight while isolating vibration from the body. The complete assembly is dynamically balanced as a unit to a residual imbalance specification typically below 5 g·cm at 3,000 RPM.
This unit — MERCEDES-BENZ A2044106801 — is manufactured to OEM-equivalent specifications: tube outer diameter, wall thickness, and material grade, universal joint trunnion cross dimensions and needle bearing cup diameter, flange bolt circle and bolt count at each end, slip joint spline count and diameter, overall assembled length, and dynamic balance residual imbalance specification are matched to the original part. Supplied as a complete dynamically balanced assembly ready for installation. Available wholesale from 33.56 USD, MOQ 10 pcs, production lead time 14 days.
Propeller shafts fail through universal joint needle bearing wear and cup fracture from inadequate lubrication — most modern sealed UJs are lifetime-lubricated and fail when the grease depletes after high mileage or when the seal is breached by water ingress; through tube denting or bending from road debris impact that destroys the dynamic balance and introduces a bending moment that causes rapid universal joint and centre bearing failure; and through slip joint spline corrosion seizure that prevents the shaft's length from changing freely, imposing large axial loads on the transmission output seal and differential input bearing when the driveline angle changes. A propeller shaft that has been bent or significantly dented cannot be straightened — the residual stress pattern and the balance condition cannot be restored without factory-level equipment, making complete shaft replacement the only correct repair.
- Mark the transmission and differential flange bolt positions before removing the old shaft — on propeller shafts with non-symmetrical flange bolt patterns the shaft can only be installed in one orientation; on symmetrical patterns the shaft should be installed in the original orientation to preserve the factory-set phasing relationship between the front and rear UJs; use a paint pen to mark the relationship between the shaft yoke flange and both the transmission and differential flanges before unbolting.
- Support the propeller shaft sections at both ends and at the centre on two-piece designs before unbolting either flange — an unsupported propeller shaft that drops when the last flange bolt is removed will fall against the body tunnel or exhaust system and may bend the tube slightly; bend damage that is invisible to the naked eye destroys the dynamic balance and requires workshop balancing to correct; use a transmission jack or safety straps to support the full weight of the shaft before removing any flange fasteners.
- Clean both the transmission output flange and the differential input flange mating faces before installing the new shaft — remove all corrosion, old thread lock compound, and debris from the flange faces and bolt threads; a contaminated flange face prevents the new shaft's yoke from seating flat against the mating flange, introducing angular misalignment at the UJ that immediately begins generating vibration; torque all flange bolts to OEM specification in a diagonal sequence.
- Lubricate the slip joint splines with molybdenum disulphide grease before assembly on designs where the slip joint is accessible — the splined sliding section must move freely through the shaft's full axial range to prevent the axial hammering loads on the transmission and differential seals; apply MoS₂ grease to the full length of the male spline before sliding the joint together; do not use standard bearing grease which provides inadequate boundary lubrication for the high contact pressure spline interface.
- Torque all flange bolts and centre bearing bracket bolts to OEM specification — propeller shaft flange bolts are typically single-use stretch fasteners that must be replaced at every removal; confirm from the OEM parts data whether new bolts are required; undertorqued flange bolts allow micro-movement between the shaft yoke and the flange that generates fretting corrosion within a short operating period and eventually produces clunking at the affected joint.
- Install the new SHAFT ASSY (MERCEDES-BENZ A2044106801) in the marked orientation, torque all fasteners to specification, lower the vehicle and perform a progressive road test from 40 to 130 km/h confirming vibration is absent at all speeds, perform a clunk test by repeatedly reversing drive direction at low speed confirming no drivetrain knock, and check for transmission and differential seal leaks after 500 km before returning the vehicle to service.
| Part | Reason for Combined Replacement |
|---|---|
| Propeller Shaft Centre Bearing Support OEM ref. varies — two-piece shaft designs | The centre bearing support assembly is always disturbed during propeller shaft replacement and should be inspected simultaneously for rubber cushion cracking, bearing roughness, and bracket corrosion. A centre bearing that has been operating alongside a worn or damaged propeller shaft has been subjected to the same vibration and eccentric loading that caused the shaft damage; replace the centre bearing simultaneously with the shaft to eliminate a vibration source that would otherwise make the new shaft's performance indistinguishable from the old one. |
| Transmission Output Seal and Differential Input Seal Application-specific oil seals | Both the transmission output seal and the differential pinion seal are accessible and should be inspected when the propeller shaft is removed; a shaft with a seized slip joint will have damaged both seals through axial hammering loads. Replacing both seals simultaneously with the new shaft eliminates oil contamination of the new shaft's UJ needle bearings from a leaking adjacent seal — oil-contaminated UJ bearings wear at an accelerated rate that quickly defeats the purpose of the new shaft. |
| Gearbox and Differential Oil GL-4 or GL-5 per OEM specification | Propeller shaft removal exposes both the transmission output and the differential front flange, providing the opportunity to check oil level and condition in both units simultaneously. A propeller shaft that has failed from vibration-induced fatigue may have subjected both the gearbox and differential to abnormal load cycling that has generated metallic debris; inspect the differential drain plug magnetic insert and renew the oil in both units if metallic accumulation is found. |