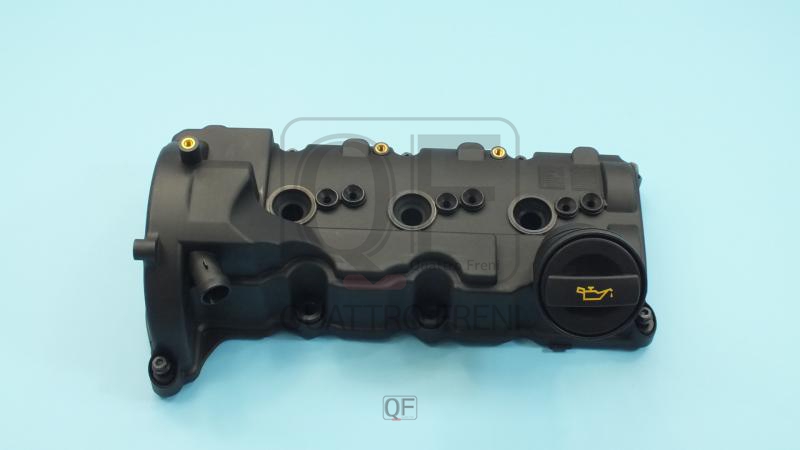
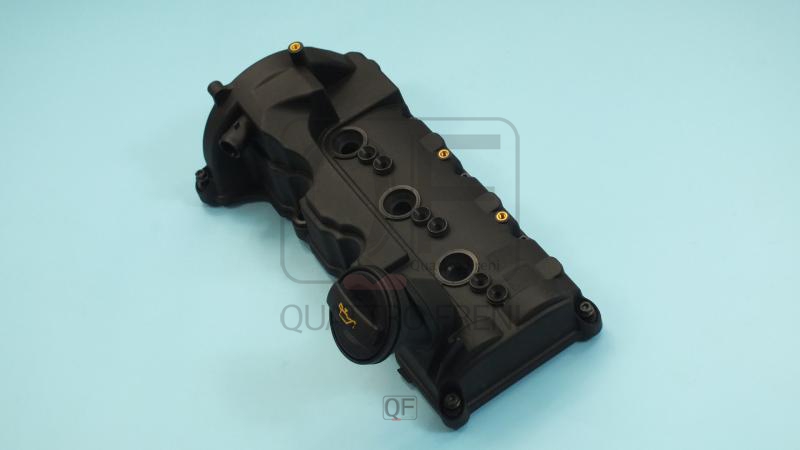
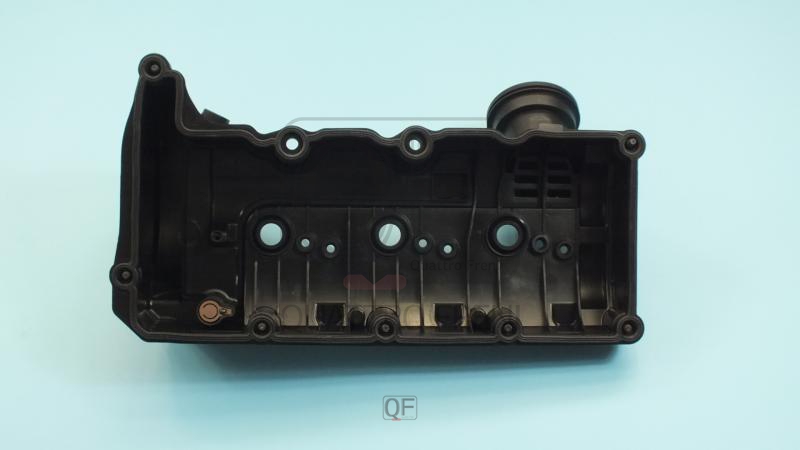
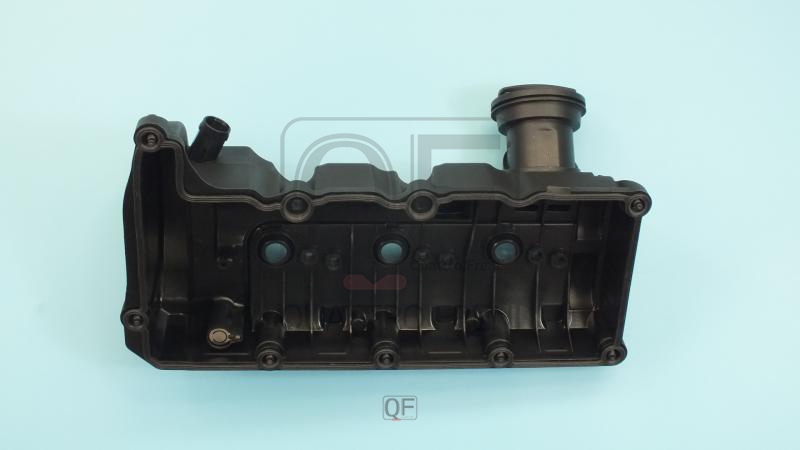
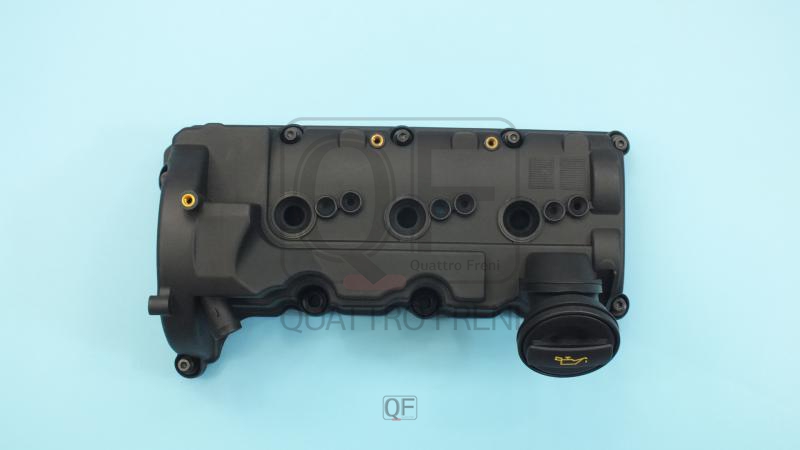
VAG/PORSCHE 059103469AR VALVE COVER
Product Specifications
| VAG/PORSCHE | 059103469AR |
| VAG/PORSCHE | 059103469AQ |
| VAG/PORSCHE | 059103469AT |
| VAG/PORSCHE | 059103469BD |
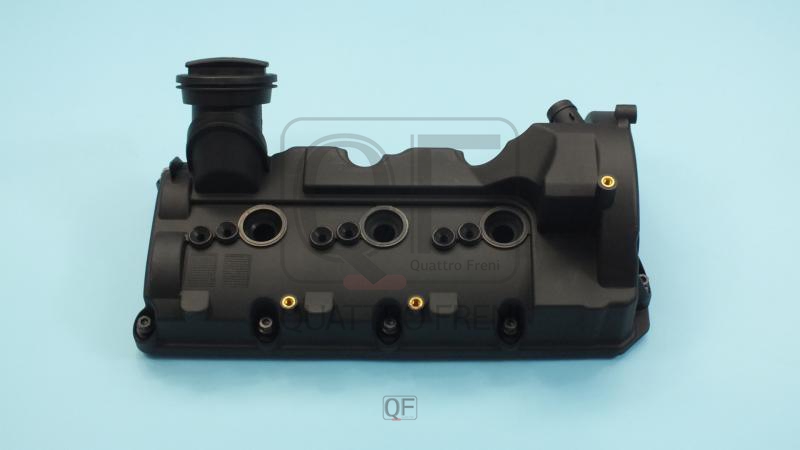
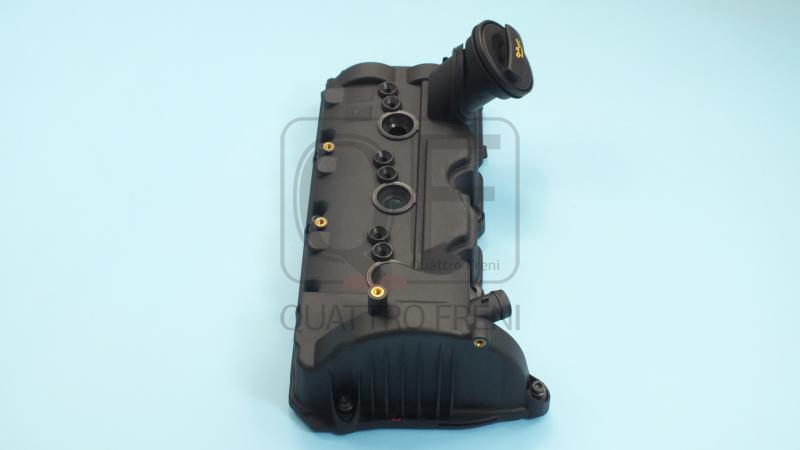
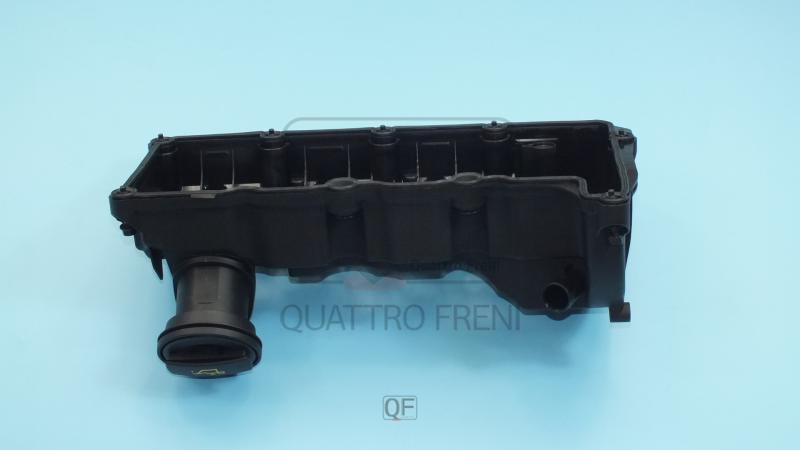
The VALVE COVER is the pressed steel, cast aluminium, or glass-fibre reinforced polymer cover bolted to the top of the cylinder head that encloses the valve train — camshafts, rocker arms or bucket tappets, and valve springs — protecting these components from contamination and retaining the engine oil mist that lubricates the upper valve train within the sealed head cavity. The cover performs three functional roles beyond simple enclosure: it provides the mounting surface and internal baffling for the positive crankcase ventilation (PCV) system that routes blowby gases from the crankcase through an oil separator integrated into or attached to the cover body before directing the de-oiled vapour back to the intake manifold; it houses the spark plug tube seals on engines where the plugs are recessed into the valve cover casting rather than the head; and on modern engines with integrated components, it may carry camshaft position sensor mounts, variable valve timing solenoid ports, or oil filler cap bosses as structural part of the engine's upper architecture. The cover-to-head joint is sealed with a formed rubber gasket that must accommodate the thermal expansion differential between the cover material and the aluminium cylinder head across the full temperature range from cold ambient to sustained high-load operating temperature.
This unit — VAG/PORSCHE 059103469AR — is manufactured to OEM-equivalent specifications: cover body profile and mounting bolt pattern, integrated PCV baffle geometry and port sizes, spark plug tube bore diameters and positions, oil filler cap thread size where applicable, gasket groove profile and dimensions, and all sensor or solenoid mounting boss positions are matched to the original part. Supplied as a direct replacement for standard fitment. Available wholesale from 31.22 USD, MOQ 300 pcs, production lead time 28 days.
Valve covers fail through oil leaks at the cover gasket from gasket compression set after high mileage and repeated heat cycling, from cover warping on plastic or thin steel covers caused by overtightened bolts that distort the sealing flange, and from physical cracks in polymer covers caused by impact or age embrittlement. A valve cover oil leak that drips onto the exhaust manifold produces an oil burning smell but no visible puddle — the oil burns off before reaching the ground — making this one of the most frequently overlooked leak sources at routine inspection. Always inspect the valve cover perimeter and spark plug tube seals at every service interval for early seepage before the leak becomes a fire risk on a hot exhaust surface.
- Allow the engine to cool fully before removing the valve cover — the cylinder head and valve cover retain heat for an extended period after engine shutdown; hot aluminium alloy is softer than cold alloy and gasket bolt threads in a hot head are more easily stripped; the new gasket should also be fitted to a cold, dimensionally stable surface to achieve correct compression set.
- Clean the cylinder head gasket groove and mating face meticulously after removing the old cover — use a plastic scraper to remove all traces of the old gasket material from the head groove without scratching the aluminium; residual old gasket compresses unevenly under the new gasket and creates leak paths; finish with a lint-free cloth soaked in brake cleaner to remove all oil film from the seating surface before fitting the new gasket.
- Apply RTV sealant at the four corners where the camshaft bearing caps meet the cylinder head surface, at the front and rear cam seal interfaces, and at any other T-junction point specified in the OEM service procedure — these are the only points where additional sealant is required alongside the formed gasket; applying RTV along the full gasket perimeter traps excess sealant inside the cover where it breaks off and blocks oil return passages or fouls cam journals.
- Seat the new gasket in the cover groove before bringing the cover to the engine — confirm the gasket is fully seated in its retaining groove around the full perimeter including all corners; a gasket that pops out of the groove at a corner during installation will pinch and tear as the cover is tightened, producing an immediate leak at that corner.
- Tighten all cover bolts in the spiral sequence specified by the OEM, working from the centre outward in two passes — first pass hand-tight to seat the gasket uniformly, second pass to the OEM torque specification — typically 8–12 Nm for aluminium heads and 6–10 Nm for polymer covers; never exceed the specified torque as the plastic inserts in polymer cover bolt holes crush permanently under overtorque, making correct sealing impossible on any future gasket replacement.
- Install the new VALVE COVER (VAG/PORSCHE 059103469AR), reconnect all PCV hoses, sensors, solenoids, and ignition coils disturbed during removal, allow any RTV to cure for the OEM-specified time before starting the engine, start the engine and run to operating temperature, then inspect the full cover perimeter and all disturbed connections for oil seepage before returning the vehicle to service.
| Part | Reason for Combined Replacement |
|---|---|
| Valve Cover Gasket Set Perimeter gasket and spark plug tube seals | The valve cover gasket set — comprising the perimeter gasket, spark plug tube seals, and any semi-circular cam seal inserts — must always be replaced when the valve cover is removed for any reason. Refitting a valve cover with an old gasket that has taken a compression set guarantees an oil leak on the first heat cycle. On engines where the tube seals are integral to the cover casting, the complete cover replacement is the only way to renew the tube seals. |
| Spark Plugs OEM ref. varies by engine | Spark plugs must be removed to access the plug tube seals and are fully accessible during valve cover removal. Any plugs showing oil fouling, worn electrode gap, or carbon deposits should be replaced simultaneously with the cover gasket — refitting oil-fouled plugs with a new cover gasket allows existing misfire conditions to continue and may cause ongoing catalytic converter damage from unburned fuel in the exhaust. |
| PCV Valve and Hoses OEM ref. varies by engine | The PCV valve mounted in or on the valve cover and the associated crankcase ventilation hoses are fully accessible during cover removal. A stuck-closed PCV valve or blocked crankcase hose causes excessive crankcase pressure that forces oil past correctly fitted gaskets and seals throughout the engine. Replacing the PCV valve simultaneously with the cover service eliminates crankcase pressure as a cause of recurring gasket leaks and restores the emission control function of the crankcase ventilation system. |