HYUNDAI/KIA 81130D4010 LOCK ASSY HOOD

Product Specifications
| HYUNDAI/KIA | 81130D4010 |
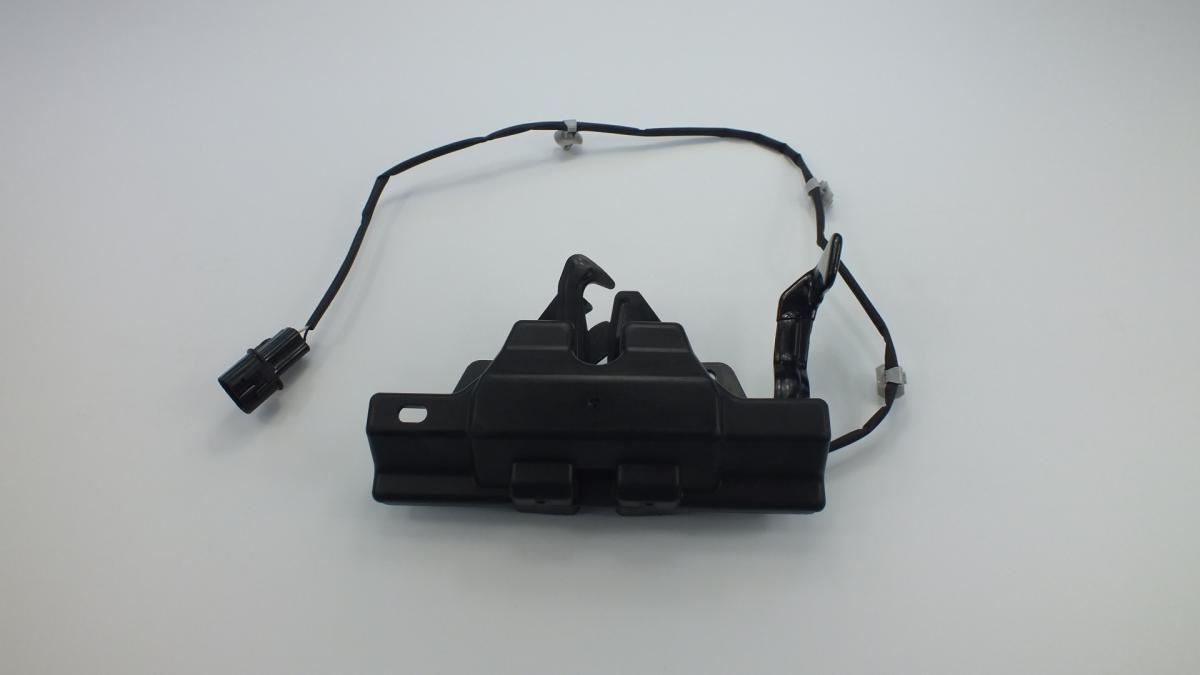
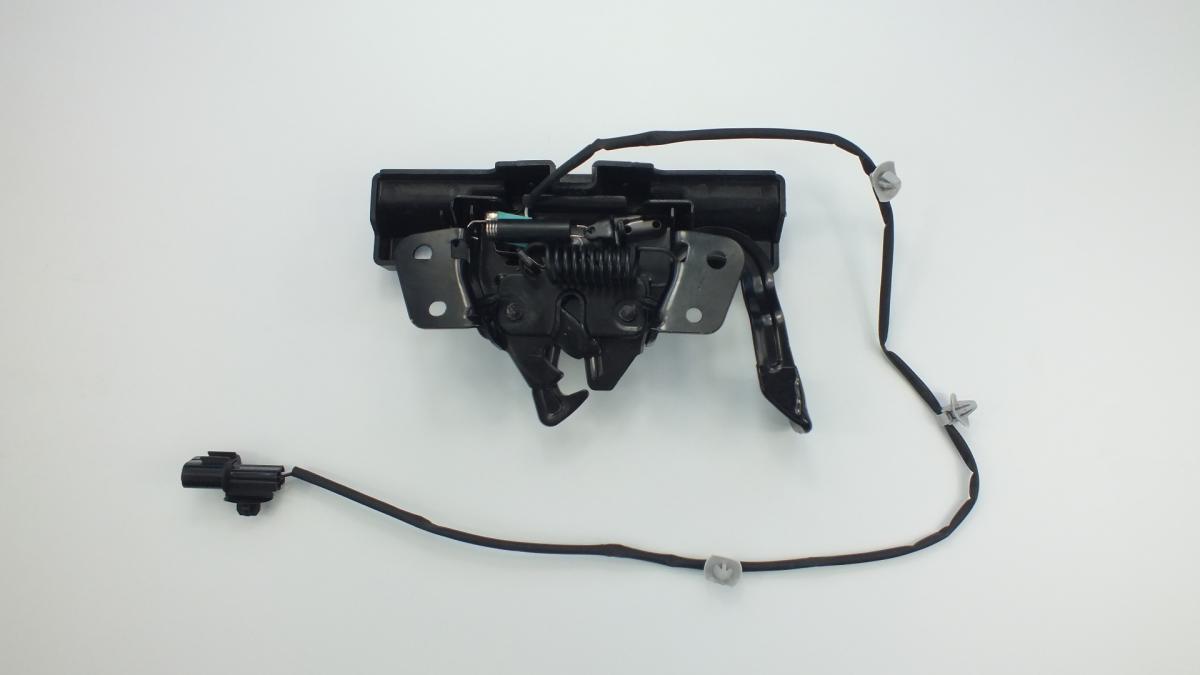
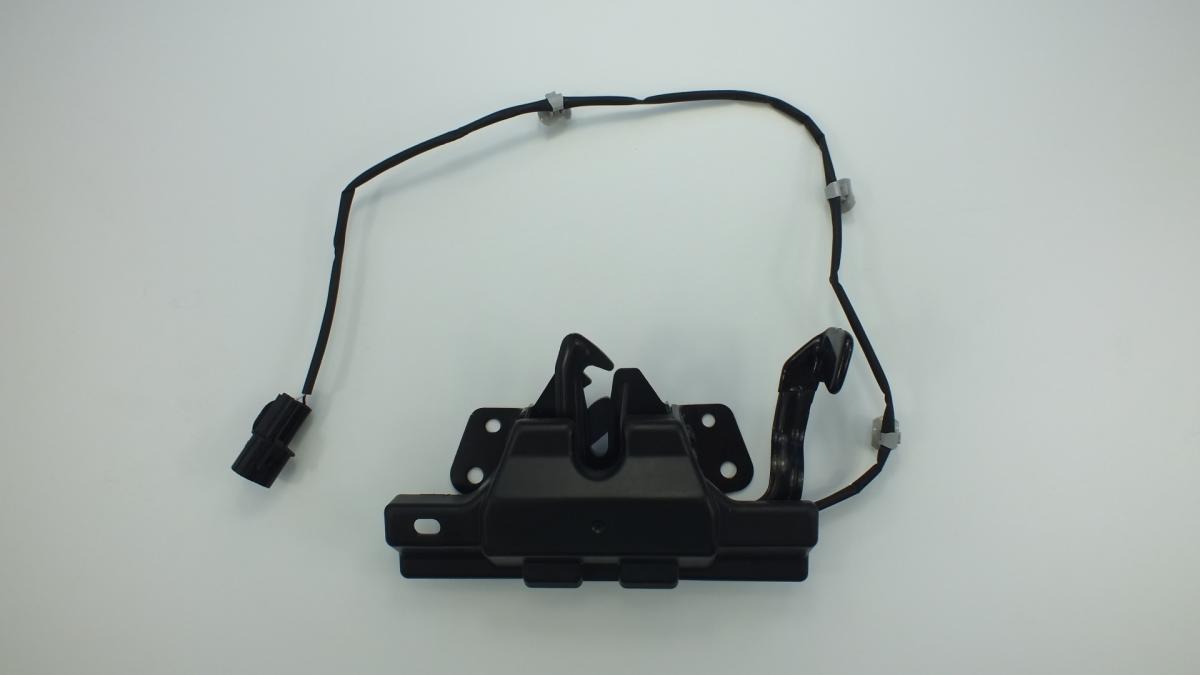
The LOCK ASSY HOOD is the bonnet latch assembly mounted on the front body cross-member or radiator support that secures the bonnet in its closed position during driving and releases it in a controlled two-stage sequence — primary release from the interior cable lever followed by secondary safety catch release at the bonnet leading edge — to allow engine bay access. The assembly integrates a spring-loaded latch fork that engages the bonnet striker pin when the bonnet is closed, capturing and retaining the striker under the spring's clamping load to hold the bonnet securely against aerodynamic lift forces at speed and against road vibration; a primary release pawl that is actuated by the interior release cable, which disengages the latch fork from the striker and allows the bonnet to rise to the secondary safety catch position — typically 50–80 mm above the closed position — rather than flying fully open in one motion; and a secondary safety catch lever accessible from the bonnet leading edge gap that the driver manually releases by feel to allow the bonnet to open completely. The two-stage release mechanism is a safety-critical feature — a bonnet that opens fully from a single cable pull without a secondary catch could open at speed from a cable actuated accidentally or by vibration, blocking the driver's forward vision entirely. The latch assembly is mounted in the underbonnet environment and must withstand continuous exposure to engine heat, road spray, pressure washing, and road salt while maintaining consistent release force and retention strength throughout the vehicle's service life.
This unit — HYUNDAI/KIA 81130D4010 — is manufactured to OEM-equivalent specifications: latch fork engagement depth and striker pin diameter tolerance, primary pawl spring load and release cable attachment geometry, secondary safety catch lever geometry and actuation force, mounting bolt pattern for body cross-member attachment, and overall assembly corrosion protection treatment are matched to the original part. Supplied as a complete assembly ready for installation. Available wholesale from 6.19 USD, MOQ 30 pcs, production lead time 25 days.
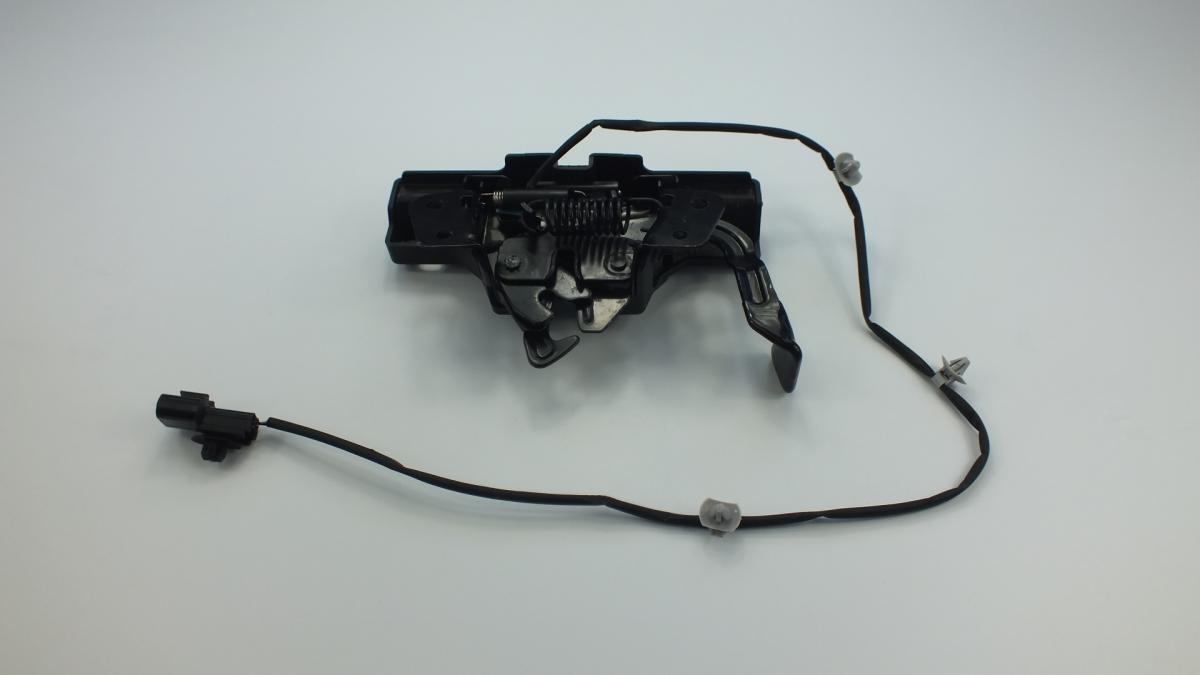
Bonnet latch assemblies fail through latch fork spring fatigue that reduces the clamping force on the striker pin — a spring that has weakened allows the bonnet to vibrate audibly at speed or to pop open on road impacts; through corrosion of the latch mechanism's internal components from road salt and moisture ingress that binds the pawl and prevents smooth release requiring excessive cable pull force; through cable attachment point wear that prevents the cable from transmitting its full travel to the primary release pawl; and through secondary safety catch corrosion seizure that requires a screwdriver or excessive finger force to release — a seized secondary catch is a safety issue that discourages drivers from releasing the catch correctly and increases the risk of an improperly secured bonnet.
- If the bonnet latch has failed with the bonnet closed, gain access to the latch before ordering the replacement — reach through the front grille aperture with a long hook, stiff wire, or screwdriver to manually actuate the primary release pawl lever on the back of the latch body; on most designs the primary pawl lever is reachable through the grille centre; a second person applying gentle upward pressure to the bonnet leading edge while the pawl is manually released prevents the latch from re-engaging; confirm the bonnet can be opened before the new latch is available.
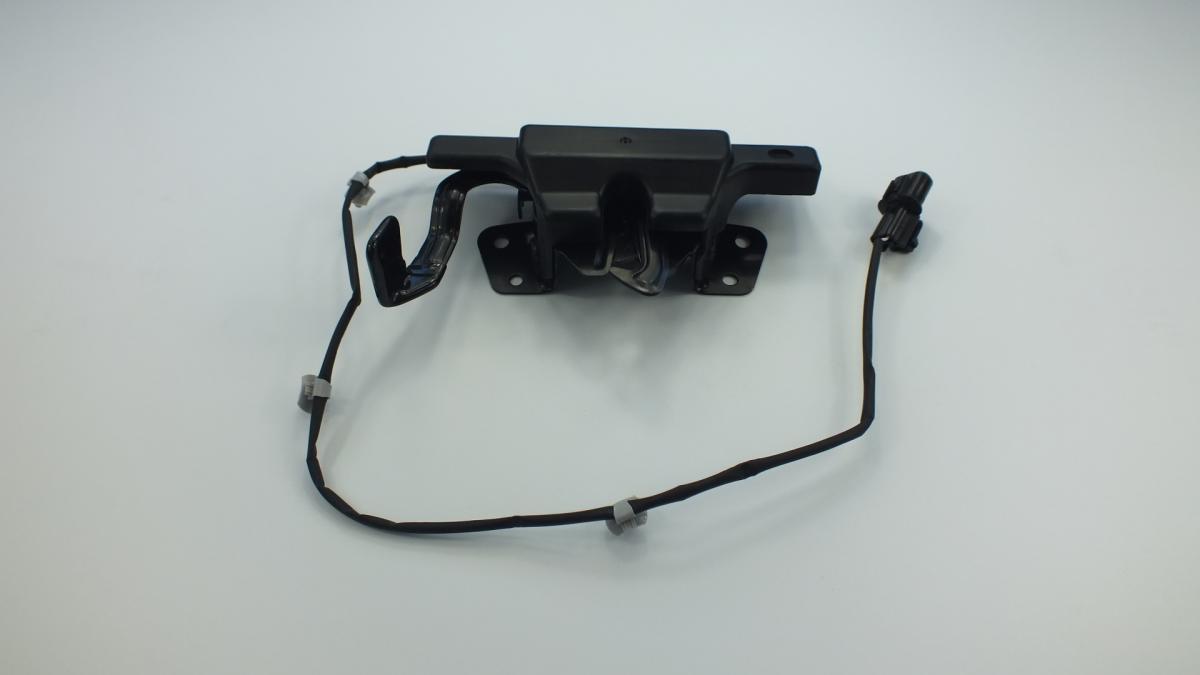
- Transfer the release cable to the new latch before installation — the cable end fitting must engage the new latch's primary pawl attachment point fully; press the end clip onto the pawl ball pin until an audible click is confirmed and tug the cable to verify retention; a cable clip that appears engaged but has not seated will detach on the first interior release pull, reproducing the original failure immediately.
- Apply a light film of lithium grease to all moving surfaces of the new latch mechanism — the latch fork pivot, primary pawl pivot, secondary catch lever pivot, and the striker contact face of the latch fork all require a thin grease film to prevent the corrosion that caused the original latch failure; apply grease sparingly — excess grease on the latch fork's striker contact face reduces the friction that contributes to striker retention under aerodynamic load.
- Adjust the striker pin height to achieve the correct bonnet closing effort and latch engagement depth — the striker bolt is typically adjustable vertically and laterally through slotted mounting holes; the bonnet should close with a firm single-hand press and the latch should engage with a clear click; if the bonnet requires a slam, lower the striker; if the bonnet gaps are incorrect after latch installation, adjust the striker laterally to centre the bonnet in the aperture before final tightening.
- Test the complete two-stage release sequence before closing the bonnet for the final time — with the bonnet propped open, pull the interior release cable and confirm the primary pawl releases smoothly with the designed force; manually close the latch to the secondary safety catch position and confirm the catch engages and holds the latch in the safety position; then manually release the secondary catch and confirm it releases with finger pressure only; only proceed to install the bonnet if all three functions are confirmed.
- Install the new LOCK ASSY HOOD (HYUNDAI/KIA 81130D4010), close the bonnet, confirm it latches cleanly with a single firm press, confirm it does not vibrate or rattle at motorway speed, and perform five complete open-and-close cycles confirming smooth primary cable release and correct secondary catch operation before returning the vehicle to service.
| Part | Reason for Combined Replacement |
|---|---|
| Bonnet Release Cable Interior handle to latch body — application-specific | The bonnet release cable transmits the interior handle pull to the primary latch pawl and is subject to the same corrosion and fatigue conditions as the latch body. A cable that has been operating against a stiff corroded latch has accumulated inner wire strand fatigue from the repeated high-force pulls required to release the binding mechanism. If the latch has failed from corrosion binding, inspect the cable for increased stiffness and replace it simultaneously if the inner wire feels noticeably stiffer than a new cable — a fatigued cable will fracture within a short interval after the new latch restores the normal release force. |
| Bonnet Striker Body-mounted striker pin — application-specific | The bonnet striker is subject to the same underbonnet corrosion environment as the latch body and develops a wear groove from repeated latch fork engagement over high mileage. A grooved striker reduces the latch fork's effective engagement depth on the new latch, potentially allowing the bonnet to vibrate at speed despite the new latch's correct spring load. Inspect the striker surface for grooves and corrosion and replace if wear is visible to ensure the new latch operates against a correctly profiled striker. |
| Bonnet Hinge Set Left and right hinges — OEM ref. varies | A bonnet that does not align correctly in the aperture after latch replacement — gaps uneven or bonnet standing proud on one side — may have a worn or bent hinge rather than an incorrectly adjusted striker. Inspect both hinges for pivot wear and corrosion that would allow the bonnet to sag or shift laterally from the designed position; a bonnet that cannot be centred in its aperture by striker adjustment alone requires hinge inspection and replacement before the aperture alignment can be correctly set. |