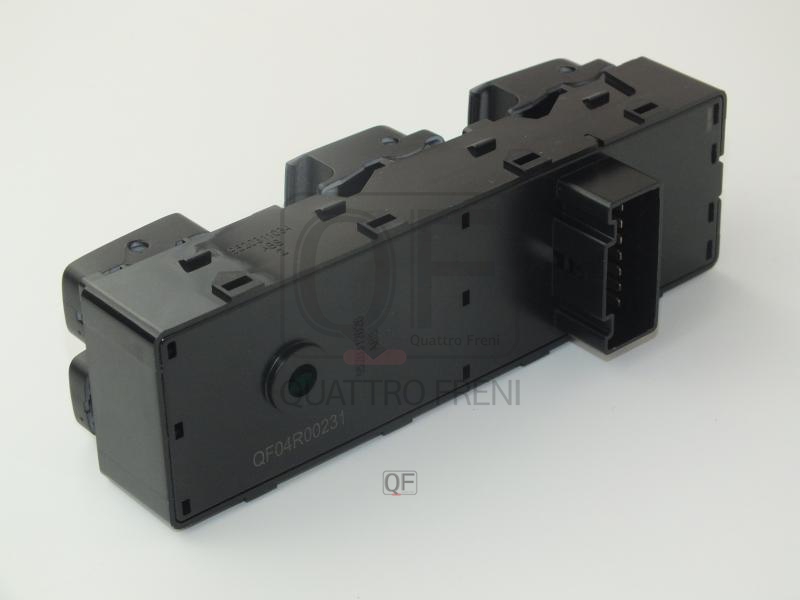
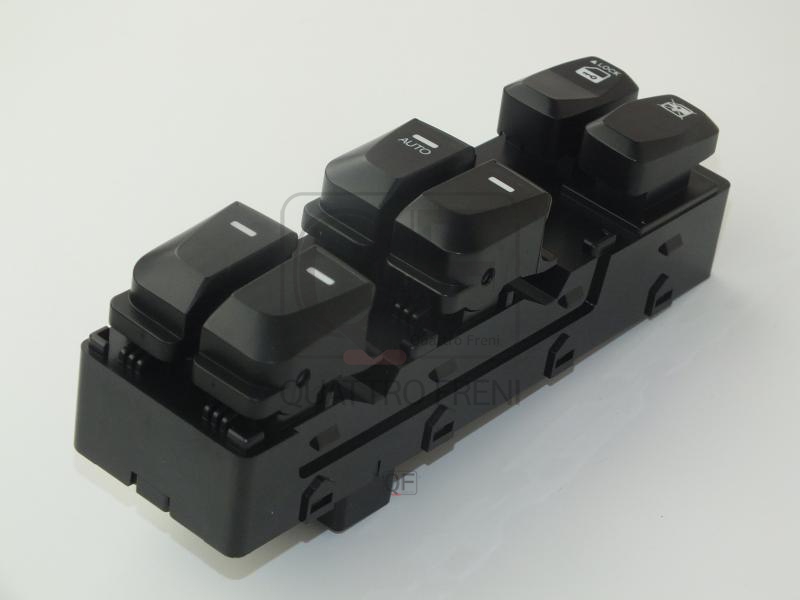
HYUNDAI/KIA 935712Y210 WINDOW MASTER SWITCH
Product Specifications
| HYUNDAI/KIA | 935712Y210 |
The WINDOW MASTER SWITCH is the driver's door master switch panel that combines the control switches for all four power windows — and frequently the door mirror adjustment joystick, child lock switch, and window isolation switches — into a single integrated assembly mounted in the driver's door armrest or door card top rail, providing the primary operator interface for the vehicle's complete window lift and mirror system. The assembly integrates individual rocker or sliding switch elements for each window position, each containing a pair of normally-open contacts that complete the motor supply circuit in either polarity depending on the direction the switch is pressed, reversing the motor rotation to raise or lower the glass; on systems with one-touch auto-up and auto-down functionality, a dedicated pulse-detection circuit within the switch assembly or the window control module detects the difference between a brief momentary press — triggering the one-touch automatic travel to the end stop — and a sustained press — commanding manual movement while the switch is held. The driver's master switch also carries the child lock switch that disables the individual rear door switches, routing rear window control exclusively through the master panel, and on some applications the window isolation switch that prevents all power window operation when the vehicle is unattended.
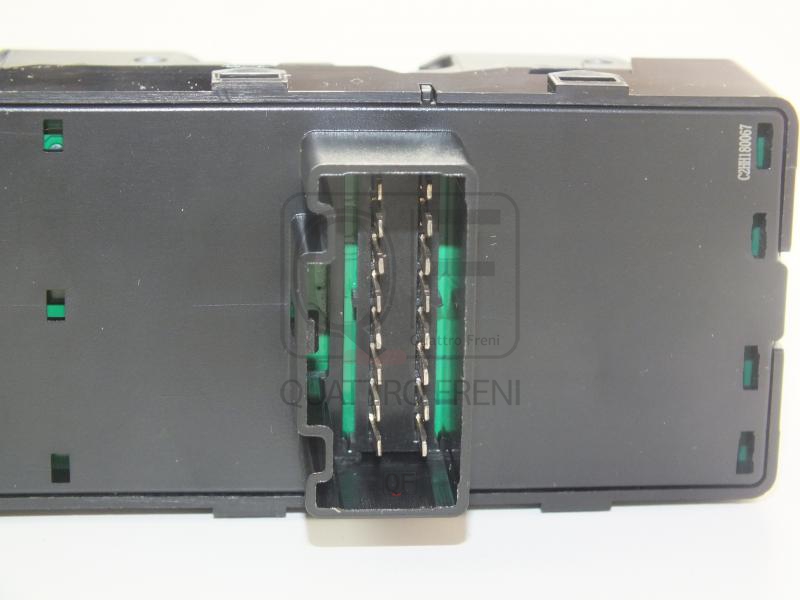
This unit — HYUNDAI/KIA 935712Y210 — is manufactured to OEM-equivalent specifications: switch contact material and rated current capacity, rocker or slider travel and contact engagement force, housing dimensions and door panel mounting clip geometry, illumination LED position and colour where applicable, connector pinout and locking tab geometry, and one-touch function pulse timing characteristics are matched to the original part. Supplied as a direct replacement for standard fitment. Available wholesale from 6.19 USD, MOQ 20 pcs, production lead time 26 days.
Window master switches fail through contact oxidation from moisture ingress via the door membrane or window gap — a thin oxide film on the copper contacts increases resistance until the motor cannot receive sufficient current to start; through mechanical wear of the rocker pivot or slider track after high cycle count use on the driver's door primary window switch; and through intermittent internal circuit board cracking from door slamming vibration on assemblies with soldered PCB contacts rather than discrete mechanical switch elements. Contact oxidation is the most common failure mode and frequently produces an intermittent fault — the window works correctly when the switch is pressed hard but fails on a light touch — rather than a complete failure, which is the characteristic presentation of an oxidised rather than a mechanically failed switch contact.
- Disconnect the negative battery terminal before removing the master switch assembly — the window switch circuits carry battery voltage at all times on most vehicles; working on live window circuits risks accidental window actuation during installation and can cause short circuits if tools contact the connector pins; on vehicles with airbag modules in the door, always disconnect the battery and wait the SRS discharge period before working in the door.
- Remove the driver's door trim panel to access the switch assembly mounting clips — on most vehicles the master switch panel is retained by two or three snap-fit clips accessible from inside the door card; release the clips using a trim tool inserted between the switch bezel and the door card surface; never lever the switch out using a screwdriver on the switch face as this cracks the bezel and damages the rocker surfaces.
- Confirm supply voltage and ground at the switch connector before fitting the new assembly — if the fault is a missing supply voltage rather than a failed switch, the new assembly will show the same fault immediately after installation; apply a 12V test light or multimeter to the supply and ground pins of the connector with the ignition on to confirm both are present before committing to switch replacement.
- Inspect the switch connector for pin corrosion, bent pins, and broken locking tab before fitting the new switch — a corroded connector that caused the original fault will immediately produce the same intermittent contact resistance on the new switch; clean corroded pins with electrical contact cleaner and a fine brush; a connector with a broken locking tab must be repaired or replaced to prevent the connector from vibrating loose on the new switch.
- Seat the new switch assembly fully into its mounting recess until all retaining clips engage with an audible click; a switch that is not fully seated will rattle over rough roads and may produce intermittent contact faults as the connector vibrates at the partially engaged position; press each corner of the switch bezel firmly to confirm all clips are engaged before testing.
- Install the new WINDOW MASTER SWITCH (HYUNDAI/KIA 935712Y210), reconnect the battery, and test every switch function systematically — all four window up and down, one-touch auto functions, child lock activation and confirmation of rear window disable, mirror adjustment all directions on both mirrors, and switch illumination — before refitting the door trim panel; test the window travel limit stops on all four windows to confirm no one-touch relearn procedure is required.
| Part | Reason for Combined Replacement |
|---|---|
| Window Regulator Motor OEM ref. varies by door position | A window motor that draws abnormally high current from a seized regulator mechanism or worn motor brushes can destroy switch contacts through sustained overload — the high current flowing through the switch contacts generates heat that accelerates contact oxidation. If the master switch has failed on the driver's primary window position which handles the highest cycle count and motor current, inspect the associated window motor current draw before fitting the new switch to confirm the motor is not the root cause of the contact failure. |
| Door Wiring Harness Connector Application-specific door loom connector | The wiring harness connector at the door hinge pillar — the flex zone where the door loom passes from the body to the door — is subject to fatigue cracking from repeated door opening cycles. A harness with cracked insulation at the flex zone produces intermittent circuit faults on all door-mounted components including the window switches, making fault diagnosis difficult. Inspect the door flex zone harness whenever a window switch or motor fault is diagnosed — a fractured conductor in the flex zone will reappear as the same fault on the new switch. |
| Individual Door Window Switch Rear left or rear right, OEM ref. varies | Individual rear door window switches age at the same rate as the master switch from identical moisture exposure and thermal cycling. On vehicles where one switch in the master assembly has failed from oxidation, the individual rear door switches — which share the same construction and operating environment — are at the same wear stage. If the vehicle is being used in a fleet or high-mileage application, replacing all door switches simultaneously eliminates sequential switch failures over a short interval. |