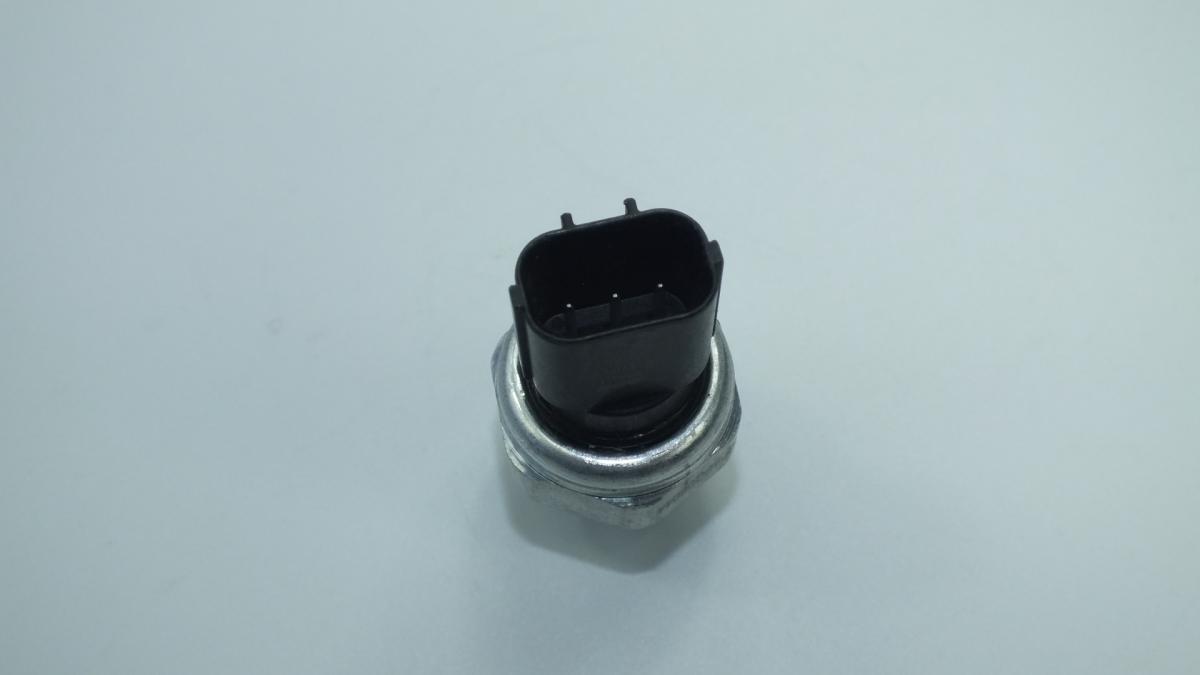
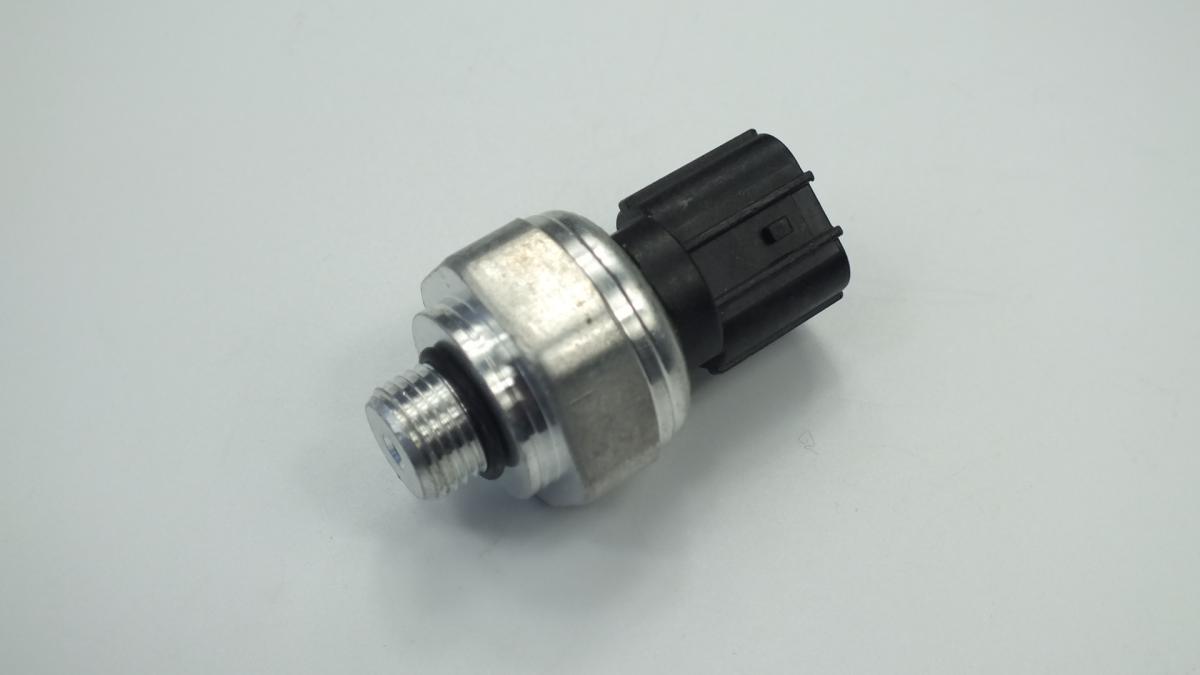
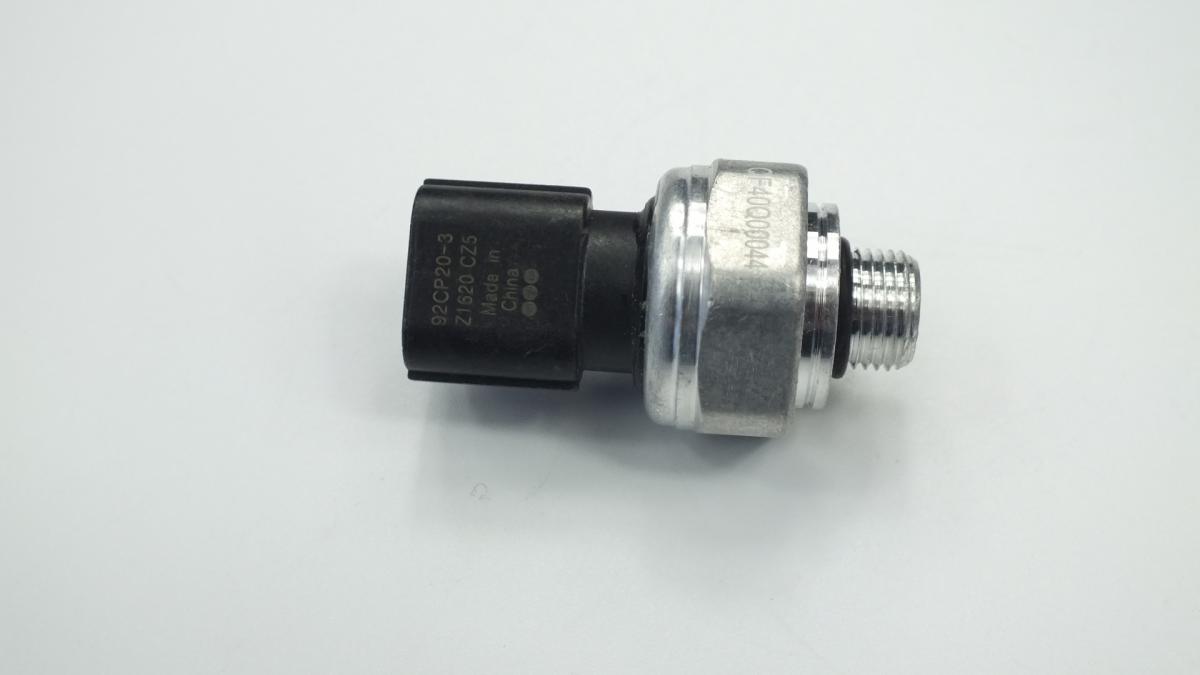
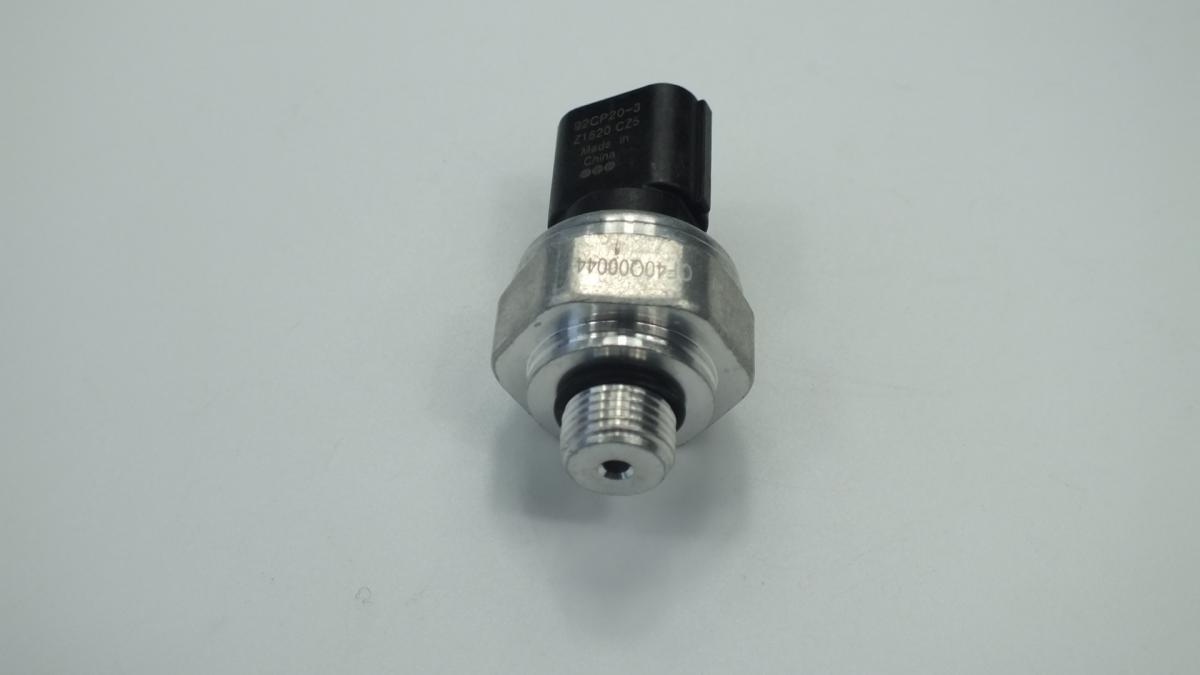
HONDA 80450SFE003 A/C REFRIGERANT PRESSURE SENSOR

Product Specifications

Product quality
OEM Equivalent Grade
starstarstar
Wholesale price USD $5.14
Wholesale price CNY ¥34.8
bolt MOQ (Minimal order)
1 pcs
local_shipping Production time
1 days
package_2 Shipping Weight:
HONDA 80450SFE003
HONDA 80450S7S003
HONDA 80450SZW003
HONDA 80450T2FA01
QUATTRO FRENI QF40Q00044
Overview & Operating Principle

The A/C refrigerant pressure sensor (also known as A/C pressure switch or HVAC pressure transducer) is a critical climate control component monitoring refrigerant pressure in automotive air conditioning systems protecting compressor from damage while optimizing cooling efficiency. This Honda sensor (OEM 80450SZW003, 80450SFE003, 80450T2FA01, 80450S7S003 for Honda vehicles and Acura luxury brand 2006-2024) mounts on high-pressure refrigerant line typically near condenser or receiver-dryer measuring system pressure across operating range 0-30 bar (0-435 psi) providing both analog voltage signal (0.5-4.5V proportional to actual pressure) enabling Powertrain Control Module (PCM) or climate control module to optimize compressor clutch engagement and electric cooling fan speed plus discrete pressure switch function with calibrated high-pressure cutoff (typically 27-32 bar preventing compressor operation during refrigerant overcharge, condenser blockage, or excessive ambient temperature) and low-pressure cutoff (typically 1.5-3 bar preventing operation when refrigerant charge too low risking compressor damage from inadequate oil lubrication critical for long compressor service life particularly important on Honda hybrid and electric vehicles).

The sensor employs piezo-resistive or Hall-effect pressure transducer technology where silicon diaphragm exposed to refrigerant pressure deflects proportionally to applied force changing electrical resistance of strain gauges or Hall element creating voltage output linearly related to pressure magnitude. Honda PCM receives continuous pressure signal via dedicated analog input circuit sampling 10-50 times per second enabling real-time compressor control and multi-level system protection: preventing compressor clutch relay engagement when pressure below minimum threshold (typically 1.5-3 bar or 22-44 psi) indicating insufficient refrigerant charge that would cause compressor operation without adequate oil circulation leading to bearing seizure within minutes particularly critical on Honda R134a and R1234yf systems where refrigerant and oil form single-phase mixture requiring adequate charge for oil transport, disabling compressor when pressure exceeds maximum safe limit (typically 27-32 bar or 392-464 psi) during condenser airflow restriction, refrigerant overcharge, or extreme ambient conditions preventing compressor thermal overload and potential refrigerant line rupture, modulating compressor cycling frequency based on pressure trends maintaining optimal cabin cooling while minimizing compressor clutch wear from excessive engagement cycles extending clutch bearing and friction plate service life, and controlling electric cooling fan operation (single-speed, dual-speed, or variable PWM depending on model) based on refrigerant pressure combined with engine coolant temperature ensuring adequate condenser heat rejection across all operating conditions from idle in traffic to highway cruising particularly important on Honda Civic and CR-V compact models with smaller radiator and condenser packaging.

Honda and Acura vehicles integrate pressure sensor into comprehensive climate control including Automatic Climate Control using pressure feedback to optimize compressor duty cycle, Hybrid and Electric vehicles (Accord Hybrid, Clarity, Insight, CR-V Hybrid, MDX Hybrid, NSX) where electric A/C compressor requires precise control preventing battery drain during EV-mode, Variable Displacement Compressor systems on many models using pressure data to modulate capacity from 10-100% providing smooth cooling, and Engine Thermal Management limiting compressor during maximum load. Sensor failure disables compressor - PCM interprets missing or implausible signal as fault preventing engagement regardless of user activation resulting in complete A/C loss until sensor replaced and system verified.

Symptoms & Diagnostics

Common Failure Symptoms

Complete Loss of Air Conditioning: A/C system completely inoperative with compressor never engaging when AC button activated. Blower fan operates normally distributing ambient temperature air but no cooling occurs. Climate control display shows AC indicator illuminated but compressor clutch never clicks engaging. Most common symptom indicating sensor providing no signal (open circuit from broken internal wiring, failed transducer element, or disconnected connector), implausible signal outside acceptable voltage range (short circuit reading constant high/low voltage), or pressure switch contacts failed open. Honda PCM disables compressor clutch relay for system protection when sensor fault detected preventing potential compressor damage from operating without refrigerant charge or under excessive pressure conditions.
Intermittent A/C Operation: Air conditioning works unpredictably with compressor engaging and disengaging randomly unrelated to temperature settings or cabin load. Cooling may function properly for several minutes then suddenly stop before mysteriously resuming minutes or hours later. Pattern particularly common during initial vehicle operation becoming more consistent as ambient temperature rises. Indicates sensor electrical connector corrosion (common on Honda vehicles particularly in humid coastal climates or northern winter road salt environments where connector pins develop copper oxide green deposits), loose connector pins from road vibration allowing intermittent contact, sensor internal component failure from thermal cycling between cold refrigerant exposure and hot engine compartment environment, or wiring harness chafing damage where harness routes near sharp engine components experiencing intermittent short or open circuit from insulation wear.
A/C Works Only at Highway Speeds: Air conditioning functions adequately at highway speeds with significant ram airflow through condenser from vehicle motion but fails at idle or low speeds in stop-and-go traffic. Compressor engages and provides cooling at speed but disengages when vehicle stopped at traffic lights. Indicates sensor correctly reading legitimately high pressure at idle from insufficient condenser cooling (lack of ram air combined with potentially failed or weak cooling fan) causing PCM to appropriately disable compressor via high-pressure protection preventing thermal damage, or sensor providing erratic signal affected by engine vibration frequency at idle but stabilizing at highway speeds where vibration characteristics different. May indicate actual system problem (condenser restriction from debris accumulation, inoperative or weak cooling fan particularly common on high-mileage Honda Civic and CR-V, refrigerant overcharge from incorrect service) rather than sensor fault requiring proper diagnosis before condemning sensor.
Compressor Short Cycling: Compressor engages and disengages every 3-10 seconds producing clicking noise from compressor clutch electromagnetic coil cycling rapidly and poor cooling from insufficient compressor run time preventing refrigerant from circulating adequately. Excessive cycling dramatically reduces compressor clutch bearing service life and accelerates friction plate wear from repeated engagement impacts potentially requiring expensive compressor clutch replacement. Indicates sensor providing noisy unstable analog voltage signal with rapid fluctuations causing PCM to misinterpret minor pressure variations as significant changes requiring compressor modulation, or sensor pressure switch contacts bouncing from worn spring tension or contaminated contact surfaces causing repeated open-close state changes.
Check Engine Light with A/C Codes: Malfunction indicator lamp illuminates with diagnostic trouble codes related to A/C system stored in PCM memory. On Honda vehicles with Driver Information Interface or i-MID (intelligent Multi-Information Display), specific A/C pressure sensor fault message may appear alerting driver to system malfunction. Indicates PCM detected sensor signal outside acceptable parameters during self-test or active operation triggering fault code storage and warning activation requiring scan tool retrieval for proper diagnosis.
Reduced Cooling Performance on Hybrid/Electric Models: On Honda Accord Hybrid, Clarity PHEV, Clarity Electric, Insight, CR-V Hybrid plus Acura hybrid models (ILX Hybrid, MDX Hybrid, NSX), air conditioning cooling noticeably weaker during EV mode operation (electric-only driving) compared to engine-on operation. During EV mode, electric A/C compressor runs from high-voltage traction battery and PCM may limit compressor operation if sensor provides marginal signal to prevent excessive battery drain reducing electric driving range. Failed or degrading sensor providing inconsistent signal causes PCM to conservatively limit compressor duty cycle protecting battery at expense of cooling performance frustrating drivers expecting full cooling capability during electric operation particularly important selling point for hybrid/electric vehicle buyers.

Diagnostic Trouble Codes

P0531, P0532, P0533
A/C Refrigerant Pressure Sensor Circuit Range/Performance, Low Input, High Input - Generic OBD-II codes for sensor electrical faults
B1421, B1422, B1423
A/C Pressure Sensor Circuit, Low, High - Honda-specific codes indicating sensor circuit malfunction or voltage outside acceptable range
Diagnostic Procedures: Use Honda HDS (Honda Diagnostic System), HIM (Honda Interface Module with i-HDS software), or professional scan tool to retrieve PCM fault codes and view live A/C pressure sensor data in Data List function. With ignition on but system off, sensor should read 0.5-0.9V (atmospheric pressure approximately 1 bar or 14.7 psi ambient). Start engine and activate AC button - voltage should increase to 1.8-3.0V within 2-3 seconds indicating operating range pressure 10-18 bar or 145-260 psi normal for R134a or R1234yf systems. On hot summer day with vehicle stationary, voltage may reach 3.5-4.2V (24-30 bar or 348-435 psi approaching high-pressure cutoff threshold). Fixed voltage regardless of conditions indicates sensor failure. Check electrical connector for corrosion - Honda vehicles prone to connector pin oxidation particularly in coastal humid environments or northern winter road salt exposure. Remove connector, inspect pins carefully for green or white copper oxide deposits, clean thoroughly with electrical contact cleaner and small brass wire brush ensuring pins not pushed back in connector housing from improper previous service or vibration. Measure supply voltage to sensor (should be 5.0V reference voltage on most Honda applications) and ground continuity (should be under 1 ohm resistance). Compare sensor voltage reading to manifold gauge pressure measurements - deviation exceeding 2 bar indicates sensor calibration drift requiring replacement. CRITICAL: Verify refrigerant charge adequate before condemning sensor. If system leaked refrigerant, pressure reading legitimately low causing appropriate sensor response and compressor shutoff via low-pressure protection feature preventing compressor damage. Check static pressure with engine off (should be 70-110 psi at 70-90F ambient temperature correlating with refrigerant saturation curve). Low static pressure confirms refrigerant leak requiring leak detection with electronic detector or UV dye and repair before sensor replacement solving actual root cause rather than replacing functional sensor detecting legitimate low pressure condition from leak.
Logistics & Customs
ParameterValue
Net WeightApprox. 0.07 kg (70 grams)
Country of OriginChina
HS Code9026.20.80 - Pressure measuring instruments
EAEU Code9026 20 800 0
Vehicle Compatibility

Per ok.parts OEM cross-reference table: HONDA vehicles only (also fits Acura luxury brand sharing platforms)

Honda Models (Extensive Coverage 2006-2024)

Sedans: Accord (2008-2024 including Hybrid), Civic (2006-2024), Insight (2010-2014, 2019-2024 hybrid), Clarity (2017-2021 PHEV, Electric, Fuel Cell)

SUVs/Crossovers: CR-V (2007-2024), HR-V (2016-2024), Pilot (2009-2024), Passport (2019-2024)

Minivans: Odyssey (2011-2024)

Trucks: Ridgeline (2017-2024 unibody pickup)

Compact: Fit (2015-2020), CR-Z (2011-2016 hybrid sport coupe)

Wagon: Accord Crosstour (2010-2015)

Acura Models (Honda Luxury Brand - Shares Platforms)

Sedans: ILX (2013-2024), TL (2009-2014), TLX (2015-2024), RL (2007-2012), RLX (2014-2020)

SUVs: MDX (2007-2024), RDX (2007-2024)

Performance: NSX (2017-2024 hybrid supercar)

Wagon: TSX Sport Wagon (2010-2014), ZDX (2010-2013)

OEM Part Numbers (Honda Only - Per ok.parts Table)

OEM NumberManufacturer
80450SZW003Honda current production primary number
80450SFE003Honda supersession from earlier production
80450T2FA01Honda alternate production variant
80450S7S003Honda early variant for select applications
Critical Honda/Acura Compatibility Notes: Per ok.parts official cross-reference table, all OEM numbers are HONDA brand only. However, Acura is Honda's luxury division sharing platforms, powertrains, and components - Acura vehicles use identical Honda sensors with same part numbers. Sensor fits both R134a refrigerant systems (2006-2016 applications) and R1234yf systems (2017-2024 newer environmental refrigerant) - sensor measures pressure regardless of refrigerant type though system service procedures differ. Electrical connector typically 3-pin weatherproof design with gray or black connector body. Multiple OEM part numbers reflect continuous production changes and platform evolution over 18-year application span - all functionally equivalent sensors with same electrical characteristics and pressure ranges. Sensor location varies by model: Honda Civic/Accord typically mounts on high-pressure line near condenser front of engine bay, CR-V/Pilot SUVs may mount on receiver-dryer near firewall, Hybrid/Electric vehicles (Clarity, Insight, NSX) may have unique mounting locations due to electric compressor and high-voltage battery packaging constraints. Thread size commonly M10x1.0 or M12x1.5 depending on application and production year. ALWAYS verify fitment by comparing original sensor part number stamped on sensor body or through VIN-specific Honda Electronic Parts Catalog lookup. On vehicles with dual-zone or tri-zone climate control (Odyssey, Pilot, Acura MDX select years), additional sensors may be present for rear auxiliary A/C system - this part number covers primary front A/C system sensor only. Variable displacement compressor applications (common on Honda Civic, Accord, CR-V using TRSE07, TRSE09, HS110R compressors) use same sensor as fixed displacement applications - pressure monitoring principle identical regardless of compressor type.
Installation Tips

Difficulty: Easy to Moderate. Time: 20-35 minutes. NOTE: Quick replacement minimizes refrigerant loss.

Required Tools & Supplies

  • Appropriate wrench for sensor (typically 19mm or 22mm depending on application)
  • Honda HDS or HIM diagnostic system for code clearing and verification
  • New O-ring seal (verify included with sensor or order separately)
  • A/C refrigerant oil (Honda Type S or ND-OIL for R134a systems, POE oil for R1234yf systems)
  • Clean lint-free rags
  • Safety glasses
  • Dielectric grease for connector corrosion prevention

Installation Steps

1. Safety Preparation: Work in well-ventilated area. Wear safety glasses protecting eyes from refrigerant spray. Although quick sensor replacement causes minimal refrigerant loss (8-25 grams typical), avoid breathing refrigerant vapor. Do NOT smoke or use open flames near work area - refrigerant contact with flame produces toxic phosgene gas particularly dangerous in confined spaces.
2. Locate Sensor: Sensor location varies by Honda model. Most Honda Civic and Accord applications: sensor on high-pressure line near condenser front of engine bay passenger side. CR-V and Pilot SUVs: often on receiver-dryer (cylindrical canister) near firewall. Hybrid/Electric vehicles (Clarity, Insight): may be in unique location due to electric compressor packaging. Follow 3-pin electrical connector from harness to locate sensor. On some vehicles particularly newer models, sensor access may require removal of plastic engine covers, air cleaner components, or battery. Clean area around sensor thoroughly with brake cleaner removing dirt and debris preventing contamination of A/C system during sensor removal.
3. Disconnect Electrical Connector: Press connector locking tab (typically gray tab on Honda connectors requiring firm pressure to release) and carefully pull connector straight off sensor pins. Do NOT pull wires - grasp connector body only preventing wire damage. Inspect connector pins for corrosion - Honda vehicles particularly prone in humid coastal areas or northern winter road salt environments. Green or white deposits indicate copper oxide corrosion requiring thorough cleaning. Clean pins with electrical contact cleaner spray and small brass wire brush. Verify pins not pushed back in connector housing from improper previous service or vibration - pushed-back pins cause intermittent connection even with new sensor installed.
4. Prepare for Rapid Removal: Have new sensor ready with O-ring seal installed and lightly lubricated with appropriate Honda refrigerant oil (Type S for R134a, POE for R1234yf systems - wrong oil damages system seals). Position new sensor within easy reach. Have wrench sized correctly and positioned on old sensor hex. Clear work area of obstructions. SPEED CRITICAL - goal complete sensor swap in under 8 seconds minimizing refrigerant loss to acceptable levels avoiding need for system recharge.
5. Remove Old Sensor RAPIDLY: In one quick continuous motion, rapidly unscrew sensor from refrigerant line port. Small amount of refrigerant will escape with hissing sound (normal expected behavior). Completely remove old sensor pulling straight out. Brief refrigerant spray normal from residual pressure. Work quickly but carefully avoiding cross-threading or damaging aluminum port threads which are soft and damage easily requiring expensive refrigerant line replacement if stripped.
6. Install New Sensor IMMEDIATELY: Without any delay, immediately thread new sensor into port by hand ensuring straight thread engagement before encountering resistance. Hand-tighten sensor until O-ring seal contacts sealing surface and resistance increases noticeably. Do NOT force sensor - if strong resistance encountered before O-ring seats, back out completely and restart ensuring proper alignment preventing cross-threading damage.
7. Torque to Specification: Using appropriate wrench, tighten sensor to Honda specification typically 10-15 Nm (89-133 in-lbs) depending on specific application and sensor design. Do NOT overtighten risking sensor plastic housing crack, aluminum port thread damage, or O-ring seal extrusion causing leak. Undertightening causes refrigerant leak depleting system. Proper torque essential for leak-free seal and sensor longevity.
8. Reconnect Electrical Connector: Apply small amount of dielectric grease to connector pins preventing future corrosion particularly important in humid coastal environments or northern winter road salt exposure common for Honda vehicles. Align connector carefully with sensor pins ensuring proper orientation (connector keyed preventing reverse installation). Push firmly until locking tab clicks audibly indicating full engagement. Tug gently verifying secure connection - connector should resist separation without pressing release tab.
9. Clear Fault Codes and Verify: Connect Honda HDS or HIM diagnostic system to vehicle OBD-II port under dashboard. Access PCM module. Clear all stored fault codes ensuring clean slate. Some Honda vehicles may require PCM relearn procedure after sensor replacement particularly hybrid models - follow HDS prompts if indicated. Verify no active codes present after clearing indicating successful sensor installation and proper electrical connection.
10. Test System Operation: Start engine and activate A/C to max cold with recirculation and high blower. Compressor should engage within 2-5 seconds with audible click. Run 5-10 minutes. Check for leaks with electronic detector or soap solution. Vent temperature should drop to 40-50F within 3-5 minutes. If cooling weaker than before, system may need recharge from loss during change. Use HDS to monitor live sensor voltage confirming proper function.

Critical Installation Reminders

  • WORK QUICKLY during sensor removal and installation - complete swap under 8 seconds
  • Use correct O-ring type - R134a and R1234yf systems use different seal materials
  • Apply correct Honda refrigerant oil to O-ring - Type S for R134a, POE for R1234yf
  • Do NOT overtighten sensor - plastic housing cracks easily, aluminum threads strip readily
  • Clean connector pins thoroughly - corrosion extremely common on Honda vehicles
  • Apply dielectric grease to connector pins - critical corrosion prevention step
  • Monitor for leaks after installation - even small leak causes system failure within days
  • Use HDS for proper code clearing - generic scan tools may not access all Honda-specific codes
FAQ
Q1: Will I lose all refrigerant or need full recharge?
No evacuation needed with quick-swap technique. Loss typically 10-25 grams, negligible for Honda systems holding 400-650 grams. System continues cooling without recharge in most cases. Key: prepare everything first, perform swap under 8 seconds. Slow work causes significant loss requiring recharge. If system already low from leak, additional loss may require recharge. Test cooling after - if comparable to before, no recharge needed.
Q2: My Honda hybrid has weak A/C during EV mode - is this normal?
Could be either. Honda hybrids (Accord Hybrid, Clarity, Insight, CR-V Hybrid, NSX) intentionally limit A/C during EV mode to preserve range - some reduction normal particularly in extreme heat. However, if A/C completely non-functional during EV mode but works with engine running, failed sensor likely. Test with HDS monitoring live voltage during EV mode - voltage should track smoothly without erratic jumps. Erratic signal indicates sensor failure. Also verify electric compressor functional by checking voltage supply and operation.
Q3: Does this sensor work for both R134a and newer R1234yf refrigerant systems on Honda vehicles?
Yes, sensor measures pressure mechanically regardless of refrigerant type - pressure is pressure whether R134a or R1234yf. However, O-ring seal material requirements differ between refrigerant types. R134a systems (typically 2006-2016 Honda vehicles) use HNBR (Hydrogenated Nitrile Butadiene Rubber) O-rings. R1234yf systems (typically 2017-2024 vehicles) require HNBR-X (special compound) O-rings resistant to R1234yf chemical properties. Installing wrong O-ring causes rapid seal degradation and refrigerant leak within days or weeks. Verify sensor package includes correct O-ring for your refrigerant type or order separately specifying R134a or R1234yf application. Also use correct refrigerant oil: Honda Type S or ND-OIL for R134a, POE (Polyol Ester) oil for R1234yf. Wrong oil damages system seals throughout entire A/C circuit requiring expensive repairs. Check vehicle underhood A/C specification label indicating refrigerant type - label near radiator support or hood latch typically states R134a or R1234yf with charge quantity and oil specification.
Q4: Do you offer wholesale pricing for Honda/Acura specialists?
Yes, wholesale pricing available for Honda/Acura specialists and Asian import shops. Minimum 60 sensors for distributor pricing. Volume discounts: 20-30% for 120-280 units, 30-42% for 280+ units. Custom packaging available: retail boxes, bulk cartons, private label. Technical documentation included: HDS procedures, connector cleaning guide, R134a vs R1234yf identification. Production lead time 12-18 days standard, 5-8 days expedited. Payment terms Net 30/60/90 for established accounts. Contact B2B sales for quotation.
Frequently Replaced Together