CHERY 602007399AA FRONT BUMPER - UPPER RIGHT SECTION ДЛЯ CHERY TIGGO 7 PRO
Product Specifications
| CHERY | 602007399AA |
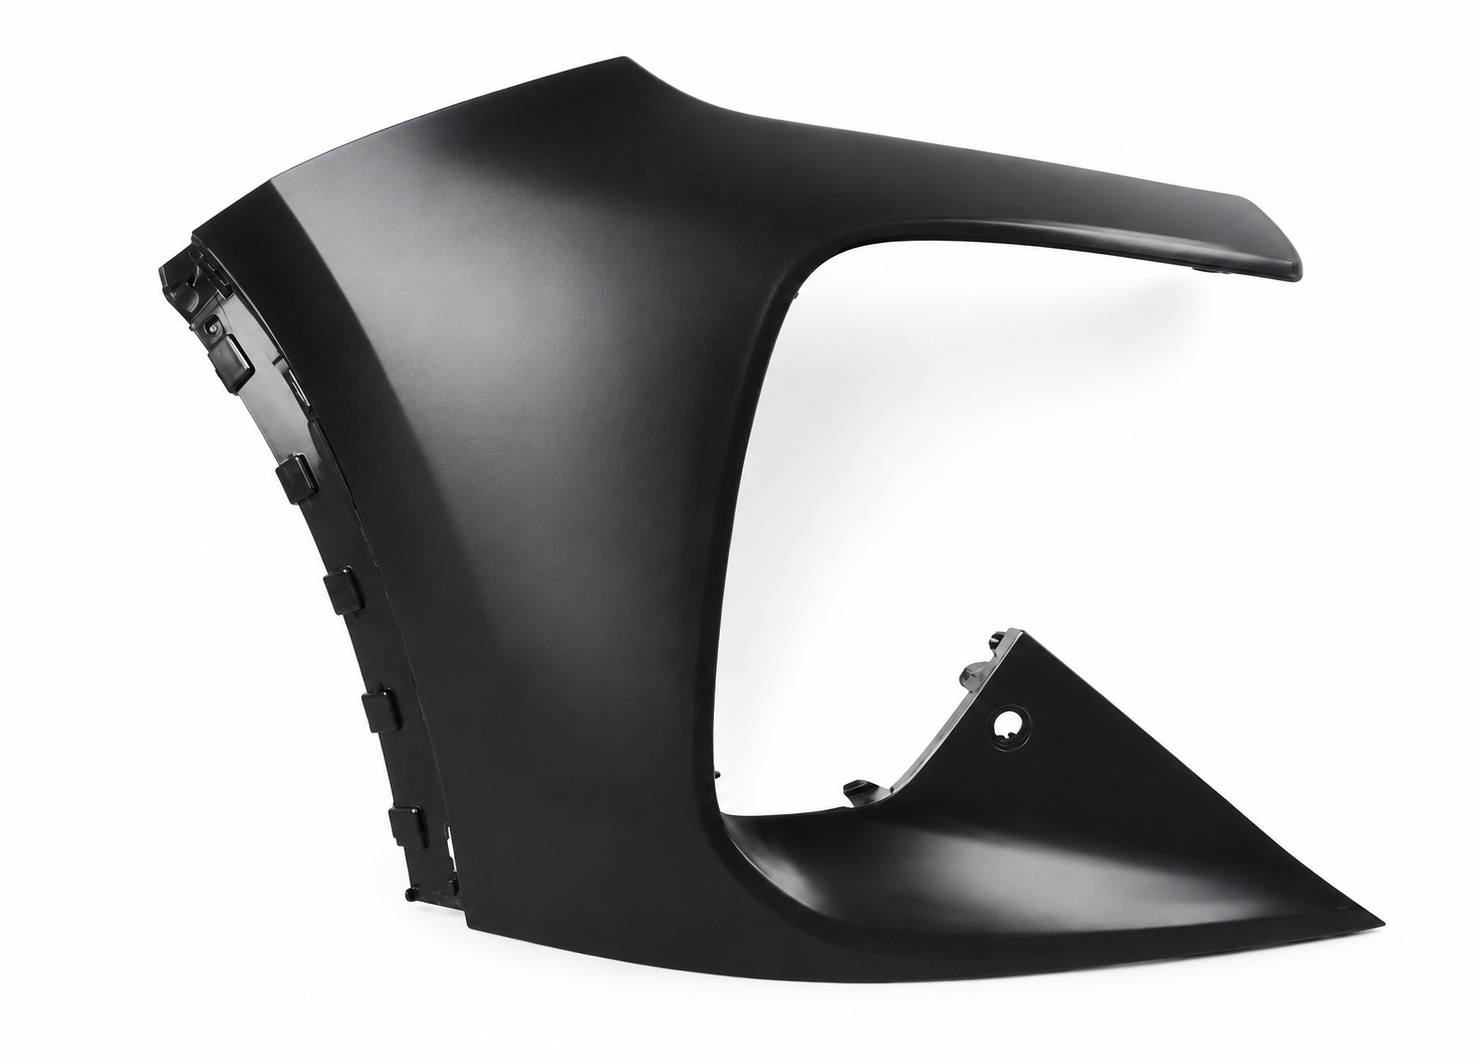
The Chery 602007399AA is the Front Bumper - Upper Right Section for the Chery Tiggo 7 Pro (T1E platform, 2020+). The Tiggo 7 Pro uses a modular multi-piece front bumper architecture — separate upper-left, upper-right, lower, centre, and bumper-cover sections that bolt together to form the complete fascia. This design simplifies repair after minor frontal impacts by allowing replacement of only the damaged section. This part is the upper right (passenger-side LHD / driver-side RHD) section.
The upper right bumper section forms the right portion of the upper bumper crossbar — the visible polymer panel above the lower bumper grille and below the right headlamp lower edge. On the Chery Tiggo 7 Pro, this section incorporates the right-side mounting attachments to the headlamp housing, the right-side daytime running light (DRL) cutout if equipped on the trim level, the upper grille perimeter trim on the right side, and the alignment tabs that interface with the upper-left section at the centre and with the lower bumper section below. The internal structure includes mounting bosses, clip retainers, and reinforcement ribs that distribute impact loads.
The Chery T1E modular bumper architecture is designed for impact-localised replacement: in a minor frontal impact only the directly impacted section needs replacement, retaining the undamaged sections of the original assembly. This significantly reduces parts cost compared to single-piece bumpers — the cost of a single section is a fraction of complete bumper replacement. The architecture allows insurance assessors to scope minor-damage repairs economically.
Replacement is required for visible cracking / impact deformation, broken mounting clips or tabs, damaged DRL cutout losing retention provisions, colour mismatches from previous non-matching repaint, and UV degradation cracking on aged polymer after sustained sunlight exposure in tropical / high-altitude markets.
| International HS Code | 8708.10 |
| EAEU Customs Code (TN VED) | 8708 10 900 9 |
| Country of Manufacture | China |
| Quality standard | IATF 16949 |
| Hazardous goods | No |
| Packaging | Individual cardboard packaging with vehicle application label and protective foam corner pieces |
Front bumper sections are typically classified under HS 8708.10 (bumpers and parts thereof for motor vehicles). Confirm the exact 10-digit subheading and applicable duty rates with your customs broker. Commercial invoice description: front bumper upper right section for passenger vehicle, injection-moulded polymer body component, supplied unpainted in factory primer for end-user refinish to matching paint code.
| Vehicle | Years & market |
|---|---|
| Chery Tiggo 7 Pro (T1E) | 2020–present — all global markets including export to Latin America, Middle East, Asia (excluding North America). All trim levels (Comfort, Luxury, Premium, etc., naming varies by market). Engines: 1.5L TGDI petrol turbo, 1.6L TGDI petrol turbo, 2.0L TGDI petrol turbo |
| Chery Tiggo 7 Pro CSH (Super Hybrid PHEV) | 2024–present — plug-in hybrid variant on the T1E platform with restyled front fascia matching the Tiggo 7 PHEV "New" model styling. Verify by OEM number before ordering — the CSH may use different bumper section references than the petrol-only Tiggo 7 Pro |
| Chery Tiggo 7 New (refresh) | 2024–present — refreshed Tiggo 7 with restyled front fascia. Verify by OEM number — the refresh may use 602007399AA or may use a different reference; the 602007XXXAA bumper section family is shared across the T1E variants but specific section numbers correspond to specific styling |
| XCITE X-CROSS 7 (rebadged Tiggo 7 Pro for some markets) | 2023–present — market-specific rebadge of the Tiggo 7 Pro on T1E platform. Same bumper architecture and likely same section references — verify by OEM number before ordering |
Does NOT fit: Chery Tiggo 7 (T15 platform, 2016–2019) — older generation with completely different bumper design and references; Chery Tiggo 7 Pro Max — restyled bumpers use different OEM references (e.g., 602001909AA / 602001910AA / 602003632AA / 602003633AA series); Chery Tiggo 8 (any generation) — larger platform with different bumpers; Chery Tiggo 9 (T26) — newer flagship platform; Chery Tiggo 4 / 5 / 5x / 2 — smaller / older platforms; Chery Arrizo series — sedan platforms; Chery Omoda 5 / 7 — different parent platform; Jaecoo J7 / J8 — different platforms; Upper LEFT bumper section of the same Tiggo 7 Pro — uses adjacent OEM number in the 6020XXXXX-AA series. Always verify by reading the OEM number stamped on the existing section.
Difficulty: Moderate. Estimated time: 90–180 minutes including paint preparation if section is supplied unpainted. The replacement section is typically supplied in factory primer and requires refinish to the vehicle's matching paint code before final installation — budget additional time for paint shop work or DIY refinish drying time.
- 1Identify vehicle paint code from door jamb sticker, under-bonnet plate, or owner's documentation. Order matching paint + clearcoat before disassembly to avoid extended vehicle downtime.
- 2Park the vehicle on a level surface with the engine cool. Open the bonnet for access to the upper bumper attachment points. Disconnect the negative battery terminal if working near electrical connections (DRL wiring).
- 3Remove any visible upper bumper retention bolts from the engine bay side — typically 2–4 bolts at the upper edge of the bumper assembly accessible after removing the upper grille trim or radiator support cover. Note bolt positions for refitting.
- 4Disconnect the right-side daytime running light (DRL) electrical connector if the upper right section incorporates a DRL housing. Photograph connector orientation. Free the DRL wiring from any clips or routing channels in the bumper.
- 5Identify section-to-section attachment points: (a) upper left section at centre seam, (b) lower bumper section below, (c) right headlamp housing. T1E modular design uses plastic clips + alignment tabs + small fasteners at these interfaces.
- 6Release the section attachment clips and fasteners using a plastic trim removal tool. Work systematically from one end to the other to avoid stressing the polymer. Aged plastic clips often break during removal on 4–5+ year-old vehicles — have replacement clips ready before starting work.
- 7Lift the old section away from the vehicle. Inspect adjacent sections (upper left, lower bumper, right headlamp housing) for collateral damage from the original impact — cracked tabs, displaced clips, or paint damage that should be addressed before installing the new section.
- 8Compare the new section to the old one — verify exact match of mounting tab positions, clip retainer geometry, DRL cutout (if applicable), grille perimeter trim profile, and overall outer geometry. Do NOT install if any geometry differs — this indicates a wrong-application part. Confirm the OEM number stamped on the new section reads 602007399AA.
- 9Refinish the new section to vehicle paint code. Factory primer accepts standard primer-sealer + base coat + clear coat per paint manufacturer process. Allow full cure before installation. Skip if pre-painted to colour code.
- 10Position the new section on the vehicle, aligning the centre seam tab with the upper left section, the lower edge with the lower bumper section, and the right edge with the headlamp housing. Press attachment clips to engage them one by one.
- 11Reinstall the upper bumper retention bolts hand-tight first to allow alignment, then torque to OEM spec (typically 8–10 Nm). Reconnect the DRL electrical connector if applicable and route the wiring through its original channel.
- 12Verify installation: panel gaps from front: right headlamp gap should match left; centre seam flush without step; lower edge aligned with lower section. Test DRL function from dashboard. Reconnect battery if disconnected.
| Part | Reference | Reason for Combined Replacement |
|---|---|---|
| Upper Left Bumper Section | Chery 602007XXX-AA series (adjacent reference in family) | Frontal impacts damaging the upper right section frequently transmit force across centre seam to upper left, causing fractured mounting tabs or hairline cracks not visible from exterior. Inspect upper left during right-side service — replace simultaneously for consistent fit / finish. |
| Lower Bumper Section | Chery 6020XXXXX-AA lower bumper reference | Impacts damaging upper right often deform lower bumper, particularly in higher-speed events or kerb-strike. Lower section bears brunt of road debris and parking damage. Inspect for cracks, scuffs, tab integrity. Replace simultaneously if damage found. |
| Bumper Support Bracket (Right Side) | Chery 602000587AA / 602000588AA / 602000608AA / 602000610AA | Internal support bracket on impact side may be deformed / fractured during original impact, even not visible from outside. Bent / cracked bracket prevents correct mounting + produces wind noise / rattles. Inspect during disassembly — replace if any deformation visible. |
| Daytime Running Light (Right Side) | Chery 605000269AA or platform-specific DRL reference | If upper right damage extended into DRL cutout area, DRL housing may be cracked or lens damaged. Damaged DRL allows water ingress destroying LED elements within months. Retention provisions in new section will not secure damaged DRL housing correctly — replace as a pair. |
| Bumper Retention Clip Kit | Chery T1E platform clip / fastener kit | Plastic clips often break during disassembly on 4+ year-old vehicles (aged polymer). Order clip kit alongside bumper section for correct refit. Inexpensive but critical — missing clips allow new section to vibrate loose, accelerating premature failure at mounting tabs and producing wind noise. |