VAG 3B1837015A DOOR LOCK

Product Specifications

Product quality
OEM Equivalent Grade
starstarstar
300 sold
Wholesale price USD $10.47
Wholesale price CNY ¥70.8
bolt MOQ (Minimal order)
100 pcs
local_shipping Production time
10-50 days
package_2 Shipping Weight: 0.6 kg
VAG 3B1837015A
VAG 3B1837015AP
VAG 3B1837015Q
VAG 3D2837015K
VAG 5Z1837015F
VAG 5Z1837015R
VAG 6X1837013A
VAG 6X1837013H
VAG 6X1837015Q
Overview & Operating Principle

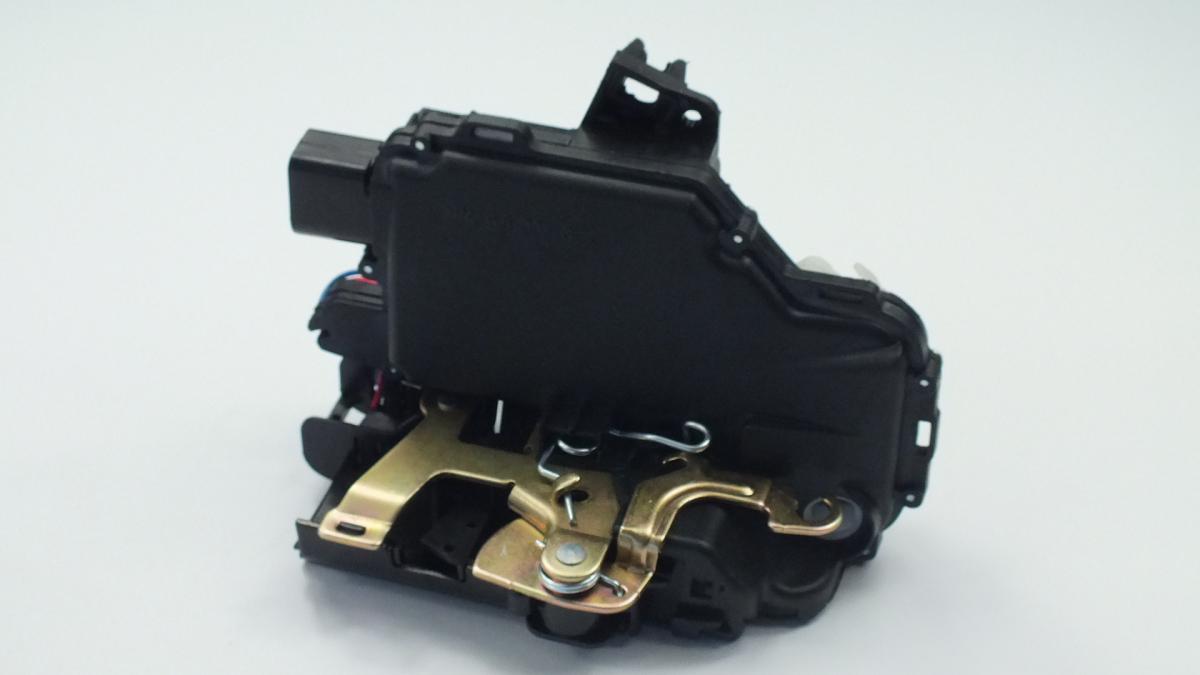
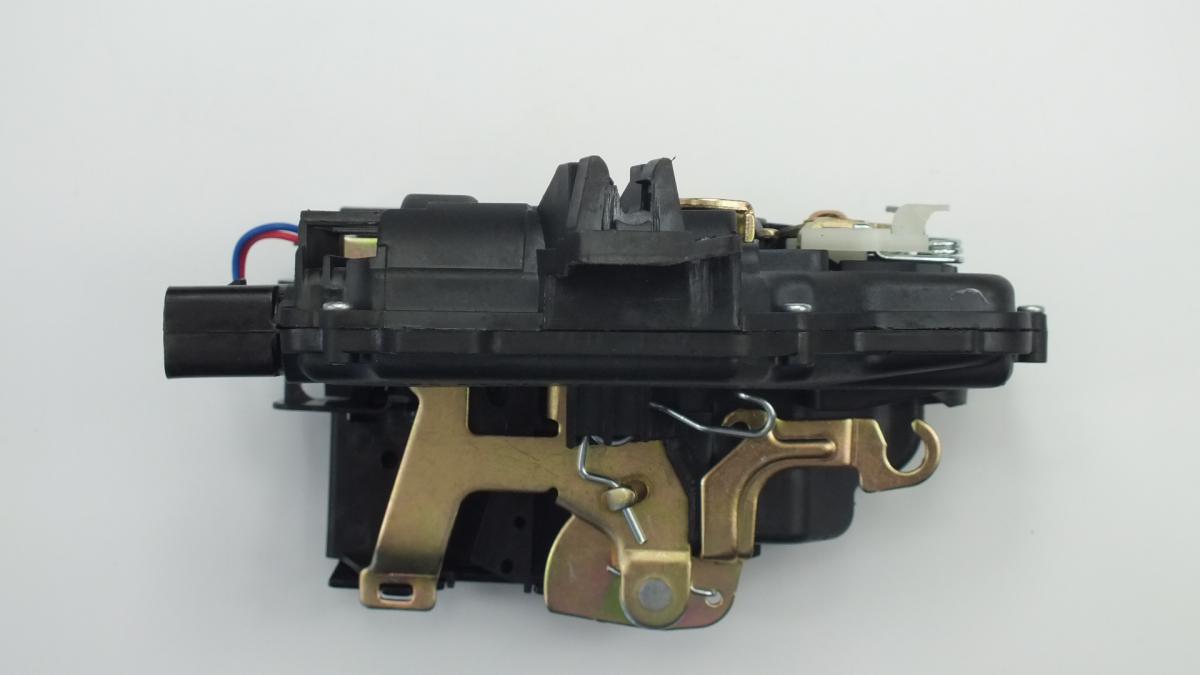
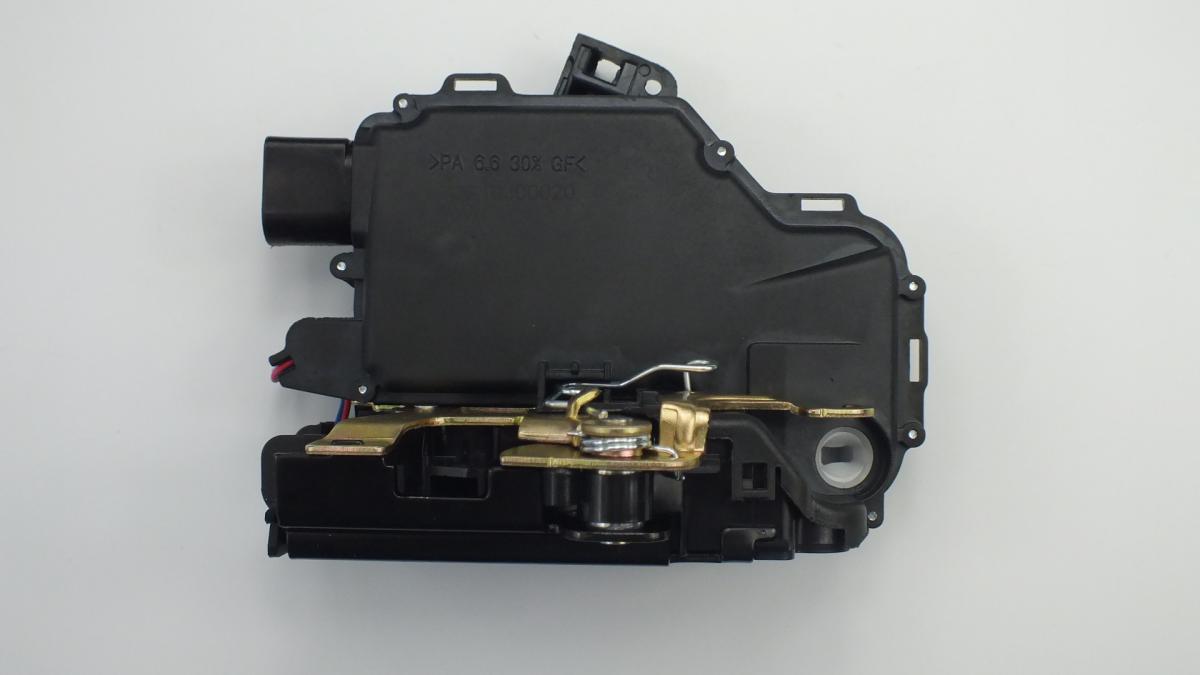
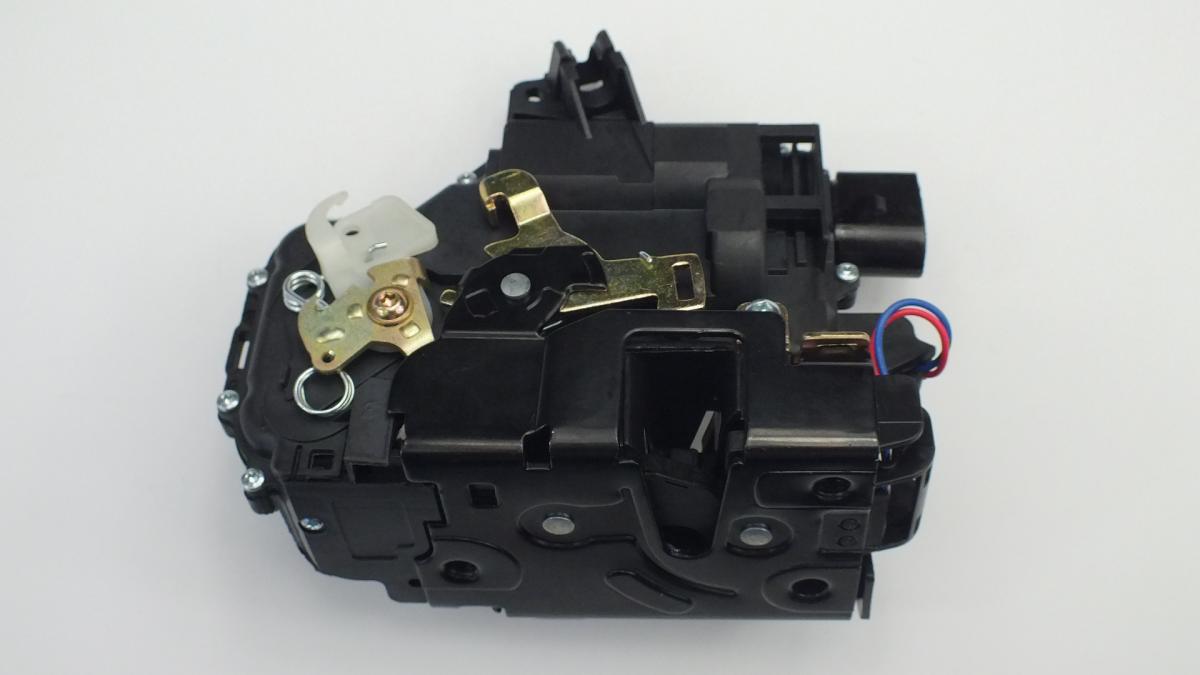
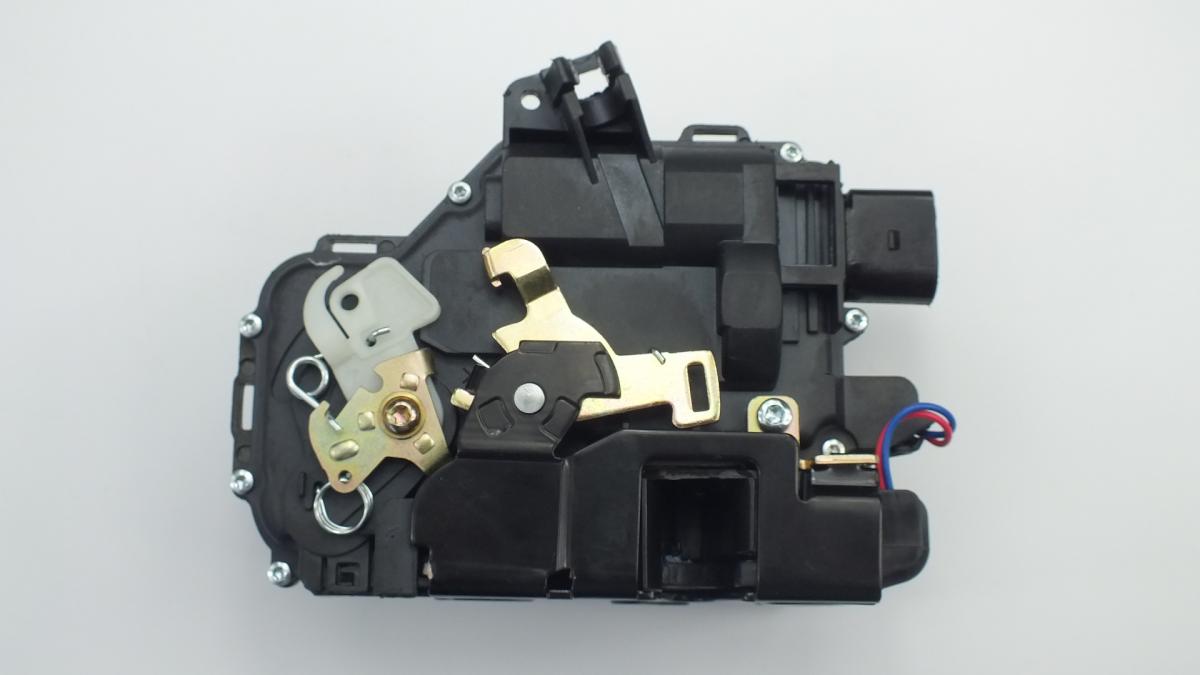
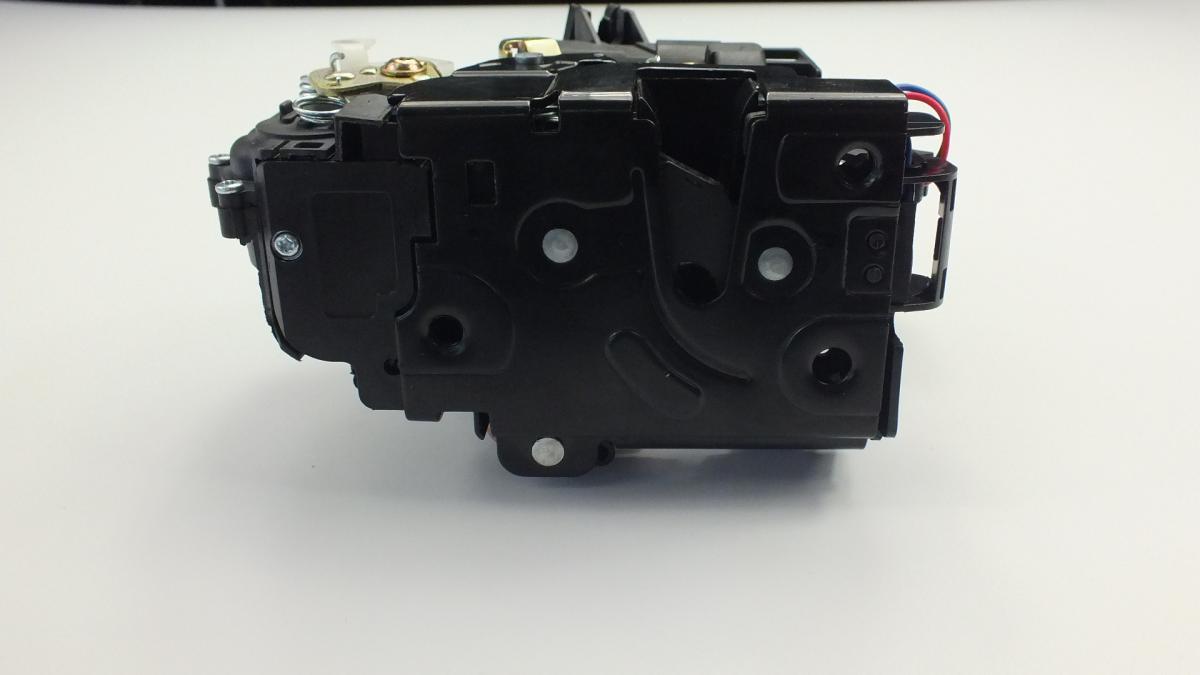
The door lock actuator (also called door latch actuator or central locking motor) is an electromechanical component that physically locks and unlocks vehicle doors when commanded by the central locking system. This VAG group actuator (3B1837015A) integrates the mechanical latch mechanism with an electric motor and position sensors in a single housing mounted inside the front door.

When the driver presses the key fob button, door switch, or central locking button, the Body Control Module (BCM) sends a 12-volt signal to the actuator motor. The motor drives a gear train that rotates a cam or lever mechanism, moving the door latch rod from locked to unlocked position (or vice versa). The actuator contains internal microswitches that provide position feedback to the BCM, confirming lock status for dashboard indicators and anti-theft systems.

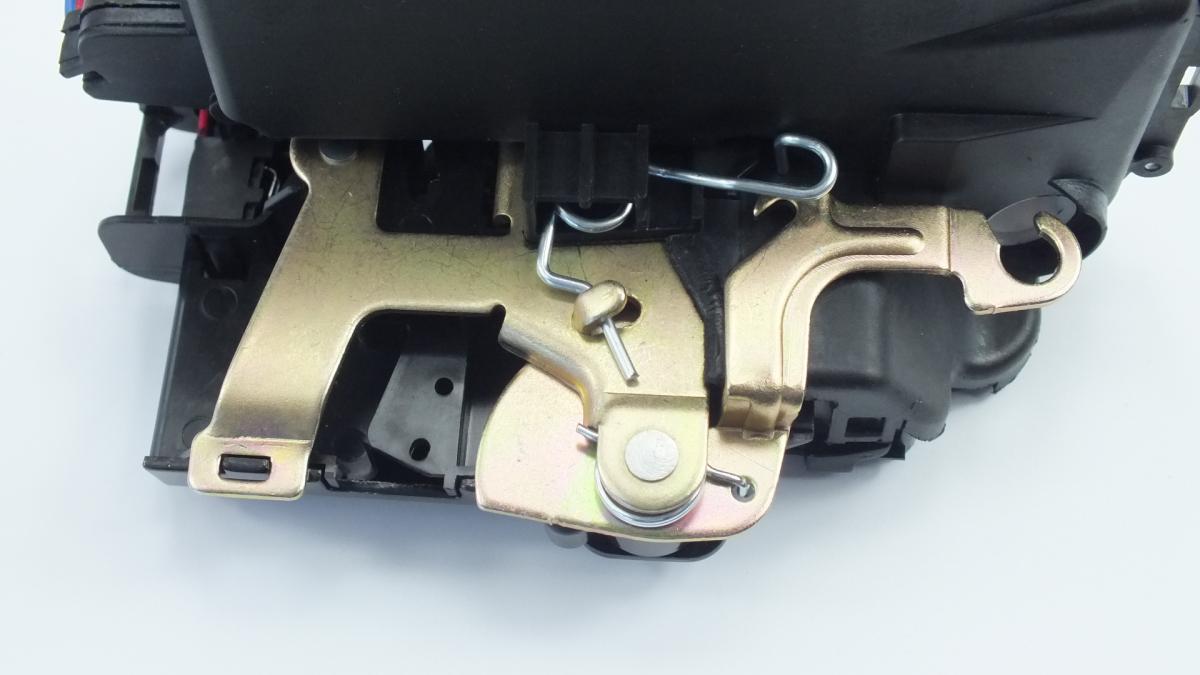
The integrated latch mechanism performs the critical safety function of keeping the door closed during driving. It consists of a fork-shaped latch that engages with the door striker pin mounted on the body pillar. When the door closes, the latch rotates around the striker and locks into place. The actuator motor controls a secondary locking pawl that prevents the latch from releasing, securing the door in the closed position.

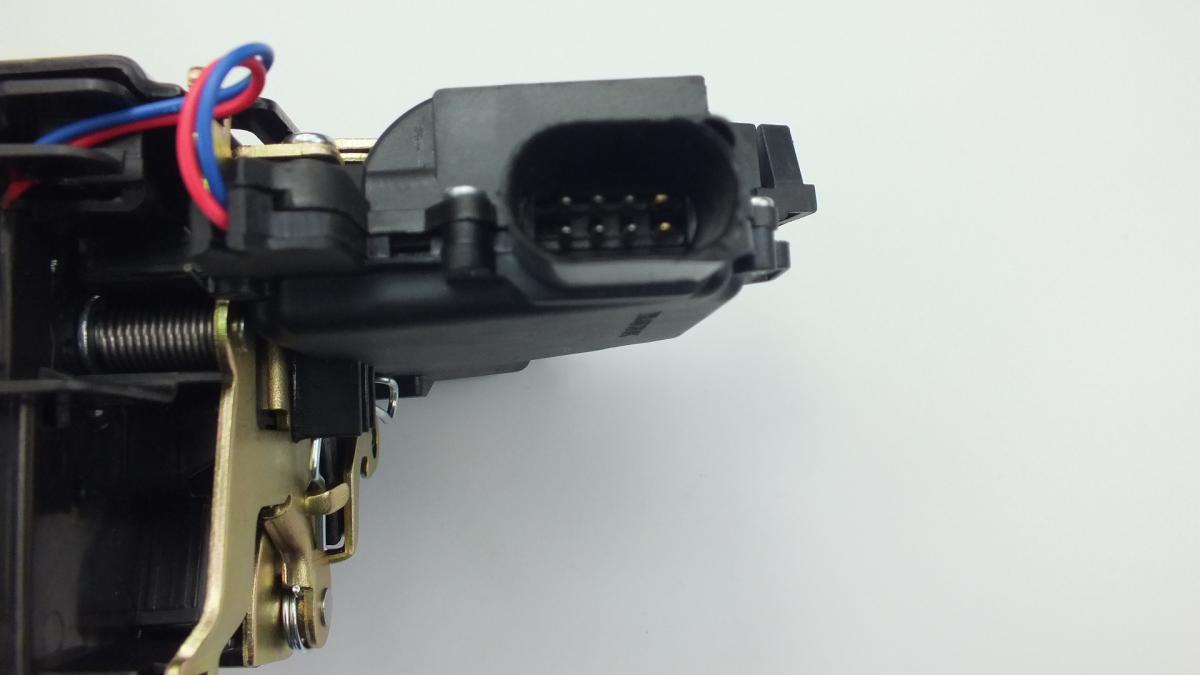
Front door actuators typically have 8-pin electrical connectors (vs 6-pin for rear doors) because they integrate additional functions: deadlock for anti-theft protection, safe unlock for child safety, and position sensors for alarm systems. The unit is designed as a complete replacement module - internal components are not serviceable separately.

Symptoms & Diagnostics

Common Failure Symptoms

Door Will Not Lock or Unlock from Remote: Central locking functions on all other doors except affected door. Key fob works for other doors but failed door must be locked/unlocked manually with interior switch or key cylinder. Indicates motor failure or gear breakage.
Intermittent Locking Operation: Door sometimes locks or unlocks, other times does not respond to central locking commands. May work when cold, fail when hot, or function only in one direction (locks but won’t unlock, or vice versa). Indicates worn motor brushes or damaged gears.
Buzzing or Grinding Noise from Door: Actuator motor runs (audible buzzing or grinding sound) but door does not lock or unlock. Motor attempting to move stripped plastic gears or broken linkage. Mechanical failure inside actuator housing.
Door Locks Then Immediately Unlocks: Door locks when commanded but spontaneously unlocks 1-2 seconds later (or reverse). Internal position sensor providing incorrect feedback to BCM, causing system to reverse command thinking door didn’t lock properly.
Central Locking System Completely Inoperative: None of the doors respond to central locking commands. Driver’s door actuator failure can disable entire system as BCM may interpret fault as security risk and shut down central locking to prevent unauthorized access.
Door Will Not Stay Closed: Door appears to latch but pops open when driving or going over bumps. Latch mechanism worn or damaged, striker fork not properly engaging. Safety-critical failure requiring immediate replacement.

Diagnostic Procedure

Use VAG-COM or VCDS to access Body Control Module (Address 09). Check for stored fault codes related to central locking. Monitor actuator operation in output test mode - command lock/unlock cycles and listen for motor operation. Measure voltage at actuator connector: should see 12V when lock commanded, 12V reverse polarity when unlock commanded. If voltage present but no motor operation, actuator motor failed. If motor runs but door doesn’t move, internal gears stripped.

Important: Before replacing actuator, verify door alignment, striker adjustment, and external linkage rods are intact. Misaligned door or bent linkage can prevent actuator from functioning even when actuator itself is good. Check door hinges for sag.
Logistics & Customs
ParameterValue
Net Weight0.6 kg (600 grams)
Country of OriginChina
HS Code8512.30.10 — Signaling equipment (sound or visual) for motor vehicles
Alternative HS Code8708.29.50 — Other parts and accessories of bodies
EAEU Code8512 30 100 0
Vehicle Compatibility

Based on verified OEM cross-reference numbers. This is a FRONT LEFT (driver side in LHD markets) door lock actuator with 8-pin connector.

BrandModelYearsNotes
VolkswagenGolf IV / Golf 41997–2006Built after 9/1998 production date
VolkswagenBora / Jetta IV1998–2005Sedan and wagon variants
VolkswagenNew Beetle1998–2010Hatchback (excluding convertible 2003-2010)
VolkswagenPassat B5 / B5.51996–2005Sedan and wagon (Variant)
VolkswagenLupo1998–2005All variants
VolkswagenRabbit (North America)2006–2009Golf V rebadged for USA/Canada
SeatLeon I1999–2006Hatchback
SeatToledo II1999–2006Sedan
SeatArosa1997–2004Small hatchback
SkodaOctavia I1996–2010Hatchback and wagon (Combi)
SkodaSuperb I2002–2008Based on Passat B5 platform
Critical: This part number is FRONT LEFT position only. Front right uses different part number (3B1837016A). Rear doors use 6-pin actuators with different part numbers (3B4839015A left, 3B4839016A right). Verify original part number and pin count before ordering.
Installation Tips

Difficulty: Moderate. Time: 60–90 minutes per door.

Required Tools

  • Door panel removal tools (plastic pry tools)
  • Torx driver set (T20, T25, T30)
  • Phillips screwdriver
  • 8mm and 10mm sockets
  • Electrical connector release tool
  • Shop towels
  • Masking tape (to protect door panel)

Installation Steps

1. Remove Door Panel: Remove door handle trim, window switch panel, and all visible screws (typically 2-3 Phillips or Torx screws). Use plastic pry tools to release panel clips starting from bottom edge. Lift panel upward to disengage from door frame. Disconnect electrical connectors for window switches and door handle.
2. Remove Moisture Barrier: Carefully peel back plastic vapor barrier sheet to access door internals. Take care not to tear - reuse original if possible or replace with new barrier. Save all adhesive clips.
3. Disconnect Actuator: Disconnect 8-pin electrical connector from actuator. Press locking tab and pull connector straight off. Disconnect door handle linkage rod and lock cylinder linkage rod from actuator by releasing plastic clips.
4. Remove Actuator Mounting Bolts: Remove 3 Torx screws (typically T20 or T25) securing actuator to door. Bolts located around perimeter of actuator housing. Carefully maneuver actuator out of door cavity - may require tilting to clear window regulator and other components.
5. Install New Actuator: Position new actuator in door ensuring proper orientation. Install and hand-tighten all 3 mounting screws. Torque to 8-10 Nm (6-7 ft-lbs). Do not overtighten plastic housing.
6. Connect Linkage Rods: Reconnect door handle linkage and lock cylinder linkage to actuator. Ensure plastic clips fully engage - pull gently to verify connection. Improper linkage connection causes door to not latch or not unlock.
7. Connect Electrical: Plug in 8-pin connector ensuring locking tab engages with audible click. Verify connector fully seated.
8. Test Function Before Reassembly: Reconnect battery and test central locking function multiple times. Lock and unlock from key fob, door switch, and interior button. Verify door latches and unlatches properly. Test door open/close operation. Fix any issues before reinstalling door panel.
9. Reinstall Door Panel: Reinstall vapor barrier ensuring good seal around perimeter. Reconnect door panel electrical connectors. Align panel on door and press firmly to engage all clips. Install screws and trim pieces. Test all functions again after reassembly.

Critical Reminders

  • Always test actuator function BEFORE reinstalling door panel to avoid duplicate disassembly
  • Linkage rod clips must be fully engaged - incomplete connection causes erratic operation
  • Do not force actuator into door cavity - if resistant, check for interference with window regulator
  • Preserve door vapor barrier - torn barrier allows water intrusion and corrosion
  • Verify correct pin count: 8-pin for front doors, 6-pin for rear doors
FAQ
Q1: Can I buy just the motor instead of the complete actuator?
No. The actuator is designed as a sealed, non-serviceable assembly. The motor, gears, latch mechanism, and sensors are integrated in a single plastic housing that cannot be disassembled without destroying the unit. Even if motor could be accessed, plastic gears inside typically fail along with motor, requiring complete replacement anyway. Always replace as complete assembly.
Q2: My passenger door (front right) also needs replacement. Is this the correct part?
No. This part number (3B1837015A) is FRONT LEFT only. Front right uses part number 3B1837016A. Although externally similar, actuators are side-specific due to linkage rod positions and latch orientation. Ordering wrong side will not fit. Always verify left vs right before ordering.
Q3: Do I need to program or code the new actuator after installation?
No programming required. The actuator is a passive electromechanical device that responds to voltage signals from the BCM. It contains no programmable electronics. Simply plug in the connector and the system will function immediately. However, if BCM stored fault codes during failure, you should clear codes using VAG-COM/VCDS after successful installation and testing.
Q4: Can I install this myself or do I need a professional?
DIY installation is feasible for mechanically-inclined individuals with proper tools. The job requires careful door panel removal (easy to break clips), proper linkage rod connection (critical for function), and patience working inside door cavity (tight quarters). Allow 90-120 minutes first time. Professional installation recommended if uncomfortable removing door panels or if door panel clips are brittle/broken. Shop labor typically 1-1.5 hours.
Q5: Do you offer bulk pricing for automotive repair shops?
Yes. Minimum order 50 units for wholesale pricing. Bulk discounts: 10-20% for 100+ units, 20-35% for 500+ units. We stock all four positions (front left/right, rear left/right) for efficient shop inventory. Custom packaging, barcoding, and technical support available. Lead time 24-35 days. Contact B2B sales for quotation and volume pricing.
Frequently Replaced Together